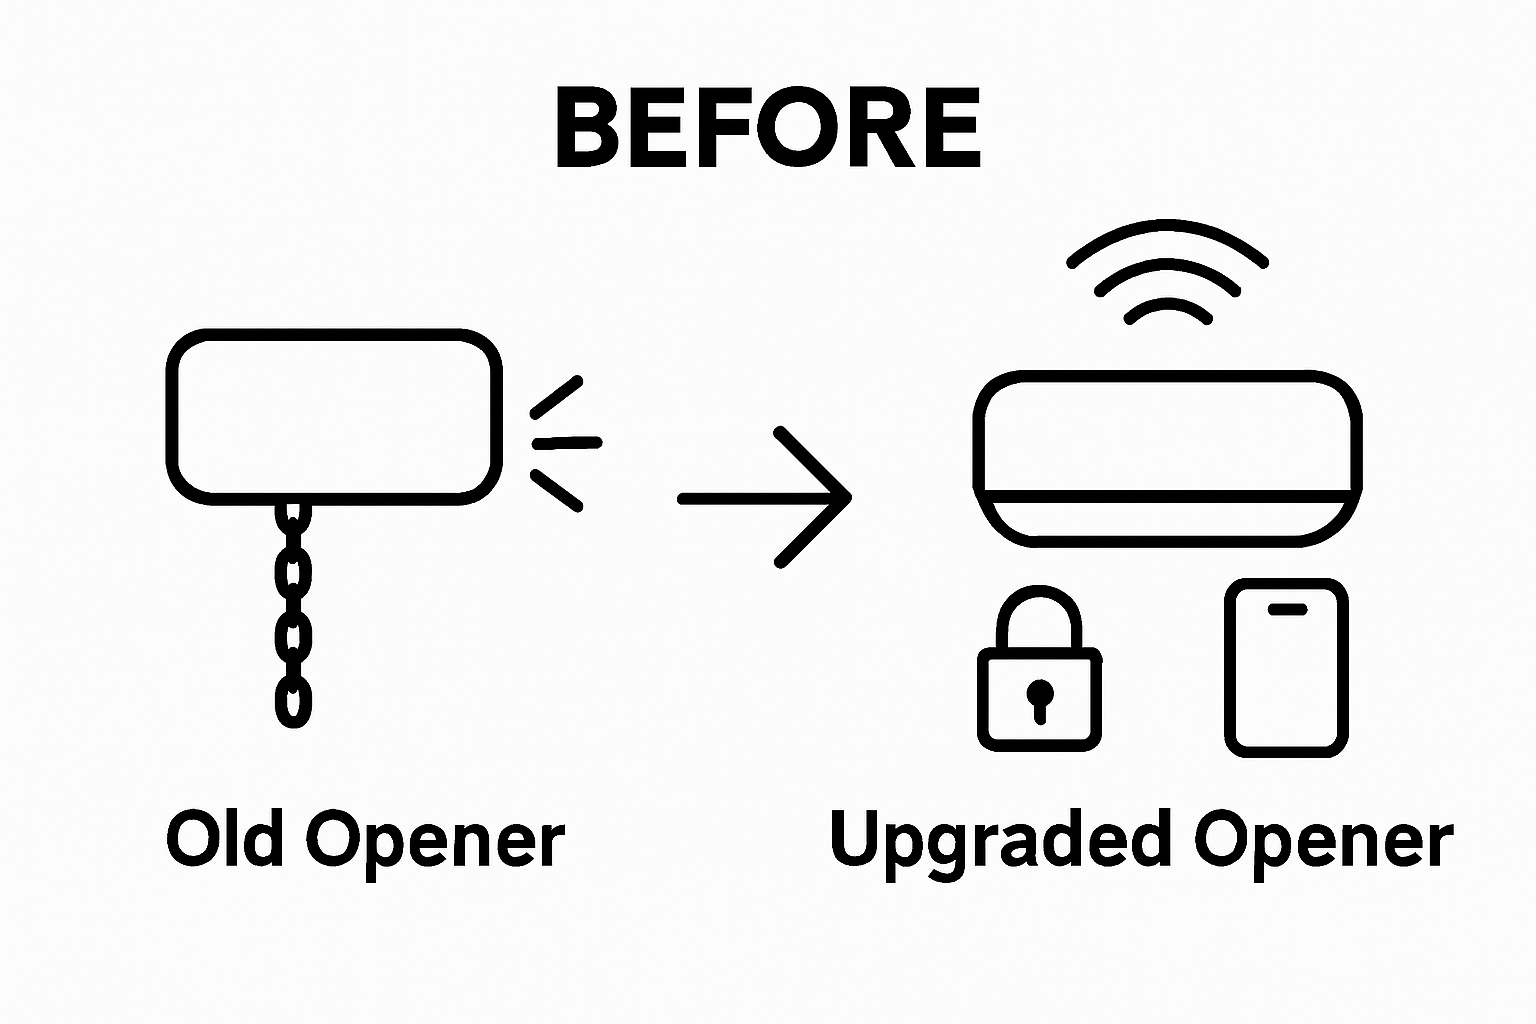
Upgrading your garage door opener can seem straightforward, but there is a lot more to it than simply swapping one machine for another. Surprisingly, garage door openers are designed to last only 10 to 15 years on average, which means most homes already have a system due for an update and may not even know it. What many miss is that those years bring major advances in both safety and tech, so a little attention now can completely change how safe and smart your home really feels.
Table of Contents
- Step 1: Assess Your Current Situation
- Step 2: Choose The Right Garage Door Opener
- Step 3: Gather Necessary Tools And Materials
- Step 4: Disconnect Power And Remove Old Opener
- Step 5: Install The New Garage Door Opener
- Step 6: Test And Verify Proper Operation
Quick Summary
| Key Point | Explanation |
|---|---|
| 1. Assess the current opener’s age | Check the opener’s installation date; most last 10-15 years and may need replacement if aging. |
| 2. Verify safety features | Ensure your opener has automatic reversal and entrapment protection features, which are critical for safety. |
| 3. Gather essential tools beforehand | Assemble tools like a power drill, ladder, and safety gear to streamline the installation process and avoid delays. |
| 4. Disconnect power before removal | Always turn off the circuit breaker and use a voltage tester to ensure safety before removing the old opener. |
| 5. Test the system thoroughly after installation | Conduct manual and electrical tests to confirm proper operation and check safety features before regular use. |
Step 1: Assess Your Current Situation
Upgrading your garage door opener begins with a comprehensive evaluation of your existing system. Understanding the current state of your garage door opener helps you make informed decisions about potential improvements and ensures you select the most appropriate replacement.
Start by examining the age and condition of your current garage door opener. Most residential garage door openers have a functional lifespan of 10 to 15 years, with wear and technological advancements often necessitating replacement. Check the manufacturer’s label or installation date to determine the opener’s age. If your system is approaching or has exceeded this timeframe, it is likely a prime candidate for an upgrade.
Perform a detailed safety and functionality assessment. According to the Consumer Product Safety Commission, residential garage door openers manufactured after 1991 must include critical safety features. Verify that your current opener meets these essential requirements:
- Automatic reversal mechanism when encountering an obstruction
- Secondary entrapment protection system (such as photoelectric sensors)
- Manual release handle for emergency situations
Carefully test the existing system’s performance by manually operating the door. Listen for unusual grinding or scraping noises, which might indicate mechanical wear. Check the door’s balance by lifting it halfway and releasing – a properly balanced door should remain in place without falling or rising. Significant resistance or uneven movement suggests potential mechanical issues that could compromise the opener’s functionality.
Document your findings systematically. Note the current opener’s brand, model, horsepower rating, and any observed maintenance needs. This information will prove invaluable when consulting with professionals or selecting a replacement. By conducting a thorough initial assessment, you set the stage for a successful garage door opener upgrade that enhances both security and convenience for your home.
Step 2: Choose the Right Garage Door Opener
Selecting the ideal garage door opener involves careful consideration of multiple factors that impact your home’s security, convenience, and functionality. The right choice will transform your daily garage experience, providing seamless operation and enhanced peace of mind.
Motor power represents a critical first consideration when choosing your garage door opener. Residential openers typically range from 1/2 to 1 1/2 horsepower, with heavier doors requiring more robust motors. Standard single-car garage doors work well with 1/2 horsepower units, while double-wide or wooden doors demand 3/4 to 1 1/2 horsepower models to ensure smooth, consistent performance.
Drive mechanisms offer distinct advantages and should match your specific needs. Chain-drive systems remain the most economical option, though they generate more noise during operation. Belt-drive openers provide quieter performance, making them ideal for attached garages or homes with living spaces adjacent to the garage. Screw-drive mechanisms work exceptionally well in areas with minimal temperature fluctuations, offering fewer moving parts and reduced maintenance requirements.
Modern garage door openers integrate advanced technological features that significantly enhance home security and convenience. Smart connectivity allows remote monitoring and control through smartphone applications, enabling you to check door status, receive alerts, and operate the system from anywhere. Learn more about smart garage door installation in Seattle to understand how these technologies can transform your home’s accessibility.
Consider these key features when making your selection:
- Battery backup capabilities for uninterrupted operation during power outages
- Rolling code technology to prevent unauthorized remote access
- Integrated safety sensors that detect obstructions and prevent potential accidents
Your final selection should balance budget, performance, and specific household requirements.
Professional consultation can help navigate the numerous options and ensure you select an opener that provides optimal functionality, security, and long-term reliability.
Step 3: Gather Necessary Tools and Materials
Preparing for a garage door opener installation requires meticulous planning and assembling the right tools and materials. This critical step ensures a smooth, efficient upgrade process and helps prevent unnecessary interruptions or multiple trips to the hardware store.
Your tool collection should begin with basic mechanical and electrical equipment. A reliable power drill with various drill bit sizes becomes your primary installation companion. Opt for a cordless model with adjustable torque settings to handle different mounting surfaces. Socket wrenches, adjustable pliers, and a sturdy ladder will prove essential for precise positioning and secure attachment. A tape measure and level become indispensable for ensuring accurate sensor and opener placement.
Electrical requirements demand specific attention. Gather electrical testing equipment like a multimeter to verify power connections and circuit compatibility. Wire strippers, electrical tape, and wire nuts will help manage any necessary electrical modifications. Always confirm you have a nearby grounded electrical outlet that meets manufacturer specifications for your new garage door opener.
Explore our comprehensive Seattle garage door installation guide for additional region-specific insights into preparing for your upgrade.
Materials specific to garage door opener installation include:
- Mounting brackets and hardware included with your new opener
- Additional lag bolts or wood screws for secure mounting
- Electrical cable appropriate for your opener’s power requirements
- Safety sensor mounting brackets
- Lubricating silicone spray for moving mechanical components
Protective gear remains equally important. Safety glasses shield your eyes from potential debris, while work gloves protect your hands during handling and installation. A dust mask can help if you’ll be working in potentially dusty environments like an older garage.
Before beginning installation, organize your gathered materials in a clean, accessible workspace near the garage door. Lay out tools systematically, ensuring everything is within easy reach. This preparation transforms a potentially complex upgrade into a manageable, methodical process, setting the stage for successful garage door opener installation.
This table organizes the main tools and materials you need for upgrading your garage door opener, along with their specific purposes.
| Tool/Material | Purpose |
|---|---|
| Power drill (cordless) | Drilling holes and mounting brackets |
| Socket wrenches/pliers | Fastening and removing bolts |
| Sturdy ladder | Safe access to ceiling and mounting areas |
| Multimeter/voltage tester | Checking electrical connections |
| Tape measure and level | Ensuring accurate and level installation |
| Mounting brackets/hardware | Securing new opener in place |
| Safety glasses and gloves | Protecting hands and eyes during work |
| Lubricating silicone spray | Reducing friction on moving components |
Step 4: Disconnect Power and Remove Old Opener
Removing your existing garage door opener requires methodical approach and strict safety precautions. This critical phase demands careful attention to electrical and mechanical disconnection, ensuring a smooth transition to your new system.
Electrical safety represents the most crucial initial consideration. Locate your home’s main electrical panel and completely shut off the circuit breaker controlling the garage door opener. Use a non-contact voltage tester to verify zero electrical current at the outlet and opener’s connection point.
Unplug the existing opener from its power source, taking care to manage any exposed wiring carefully.
Before physical removal, disengage the door from the current opener mechanism. Activate the manual release cord—typically a red handle hanging from the opener’s trolley—which disconnects the door from the motorized track system. This step prevents potential spring tension complications and allows for safe, controlled removal of the existing hardware.
Explore our comprehensive Seattle garage door replacement process for additional region-specific insights into safe opener removal.
Carefully document the existing mounting configuration before dismantling. Take photographs showing current bracket positions, electrical connections, and mounting points. This visual reference will prove invaluable during new opener installation, helping ensure precise replacement and minimizing potential alignment challenges.
Key removal steps include:
- Removing mounting bolts securing the opener to ceiling brackets
- Carefully detaching electrical connections
- Storing small hardware and brackets for potential future reference
Systematic hardware removal prevents potential damage to surrounding structures. Use appropriate tools like socket wrenches and support the opener’s weight during disconnection to avoid sudden drops or accidental damage. Work methodically, keeping your workspace organized and tracking each component as you progress.
Once completely removed, inspect the mounting area for any structural issues, accumulated debris, or signs of wear that might impact your new opener’s installation. A clean, well-prepared mounting surface sets the stage for a successful upgrade, ensuring optimal performance of your new garage door opener system.
Step 5: Install the New Garage Door Opener
Installing a new garage door opener transforms your home’s accessibility and security. This critical phase requires precision, patience, and methodical attention to detail to ensure optimal performance and safety.
Begin by carefully positioning the mounting bracket, which serves as the foundational anchor for your entire system. Locate the ceiling joists using a stud finder and mark precise mounting points that provide maximum structural support. Drill pilot holes and securely attach the header bracket using lag bolts, ensuring it can withstand the opener’s weight and operational stress. The bracket must be level and aligned perfectly with the garage door’s center to guarantee smooth mechanical movement.
Next, assemble the opener’s rail system according to manufacturer specifications. Slide the trolley onto the rail and connect it to the door’s lifting arm, taking care to maintain proper tension and alignment. Electrical connections demand meticulous attention. Route the power cable carefully, avoiding potential pinch points or sharp edges. Confirm all connections are secure and properly insulated before final mounting.
Explore our detailed Seattle garage door installation guide for region-specific installation insights and professional recommendations.
Critical installation checkpoints include:
- Verifying rail alignment with door’s center point
- Confirming secure mounting of all brackets
- Testing manual door operation before electrical connection
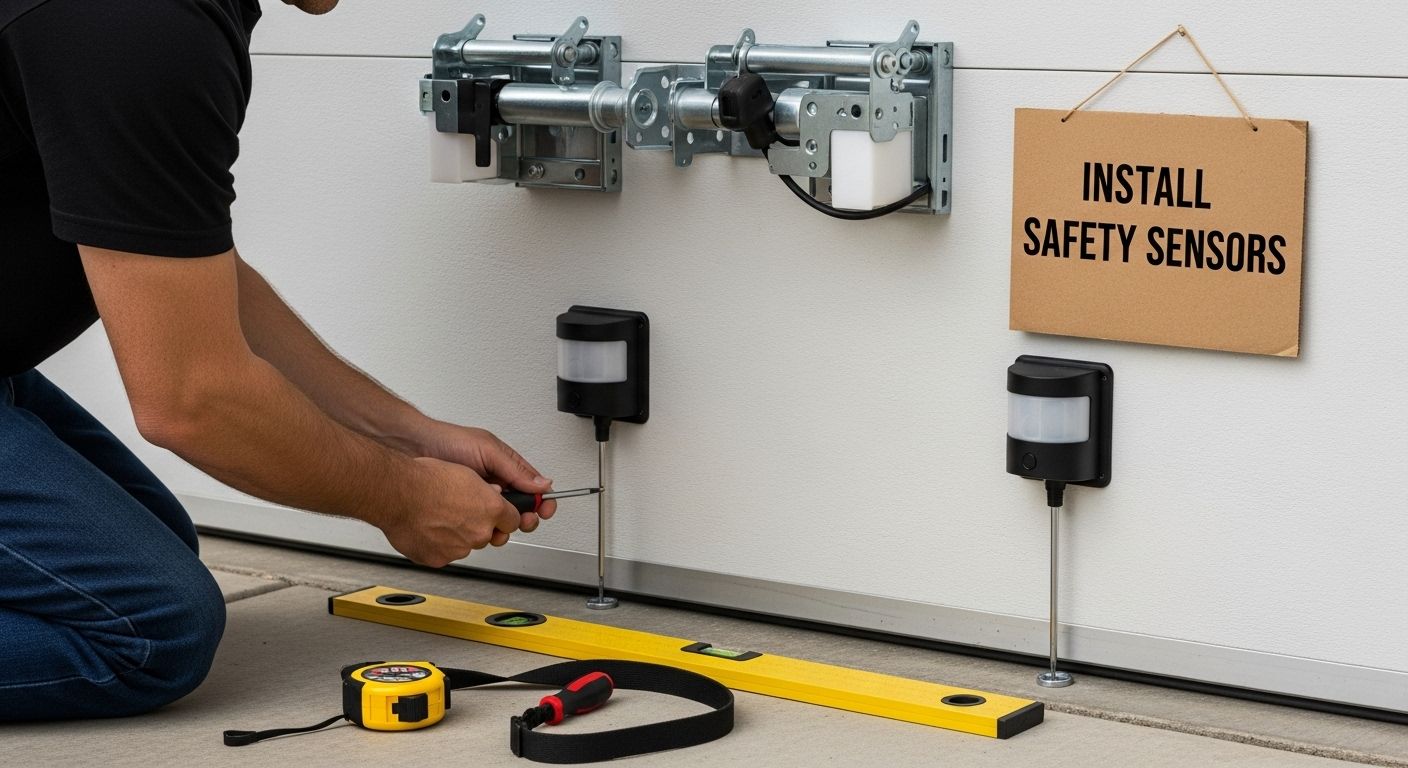
Install the safety sensors with precision, positioning them no higher than 6 inches above the garage floor. Ensure they are directly opposite each other and aligned to create an uninterrupted infrared beam across the door’s path. These sensors provide crucial protection by preventing door closure if an obstruction is detected.
After physical installation, program your opener’s remote controls and wall console, following manufacturer instructions carefully. Test the system multiple times, observing smooth operation, listening for unusual sounds, and verifying that safety features function correctly. A successful installation means your new garage door opener operates quietly, smoothly, and with robust safety mechanisms in place.
Step 6: Test and Verify Proper Operation
Verifying your new garage door opener’s functionality represents the crucial final step in ensuring safe, reliable performance. This comprehensive testing process validates the precision of your installation and confirms all safety mechanisms are working correctly.
Begin with a comprehensive manual operation test. Disconnect the opener’s power and manually lift the garage door halfway. A properly balanced door should remain stationary without falling or rising, indicating correct spring tension and mechanical alignment. If the door drops or rises spontaneously, you may need to readjust the spring tension or consult a professional technician.
Electrical testing requires systematic verification of each operational feature. Reconnect the power and test the opener using both wall-mounted controls and remote devices. Observe the door’s movement carefully, listening for smooth, consistent operation without grinding, scraping, or unusual mechanical sounds. Pay close attention to the door’s speed and smoothness during both opening and closing cycles.
Explore our comprehensive Seattle garage door safety testing guide for additional region-specific testing recommendations.
Critical safety verification steps include:
- Testing the automatic reversal mechanism using a 2×4 wooden block
- Confirming photoelectric sensor functionality
- Verifying remote control and wall console operations
The automatic reversal test represents a critical safety check. Place a 2×4 wooden block flat on the ground directly in the door’s path. Activate the closing mechanism and confirm that the door automatically reverses upon contacting the block. Federal safety standards require the door to stop and reverse within two seconds of detecting an obstruction.
Carefully test all remote controls, ensuring each device successfully triggers the opener from various distances and angles. Program and synchronize additional remotes as needed, following manufacturer instructions precisely. A successful verification means your new garage door opener operates quietly, smoothly, and with robust safety mechanisms that protect your vehicle, property, and family.
Refer to this checklist table to verify that all essential operational and safety features of your newly installed garage door opener are working correctly.
| Verification Step | How to Test | Outcome if Successful |
|---|---|---|
| Door Balance | Manually lift door halfway; release | Door stays in place |
| Automatic Reversal | Place 2×4 block in path, close door | Door reverses on contact |
| Photoelectric Sensor | Block sensor beam, activate close | Door does not close |
| Remote and Wall Console Functionality | Test all switches/remotes at various angles/distances | Door operates smoothly |
| Operation Noise/Movement | Observe during operation | Door moves quietly/smoothly |
Ready for a Safer and Smarter Garage in Seattle?
Is your current garage door opener outdated, noisy, or lacking the safety features mentioned in our upgrade guide? If you noticed any reliability issues, missing smart technology, or want better protection for your property and loved ones, now is the time to take action. At Summit Garage Doors, we understand that security and convenience matter to you. Our team specializes in professional garage door opener upgrades, giving you access to advanced safety sensors, battery backup, remote monitoring, and quiet, efficient operation. We help Seattle homeowners experience peace of mind every day.

Don’t let mechanical issues or limited features put your home at risk. Contact Summit Garage Doors for personalized recommendations and a seamless installation. Visit our main page at Summit Garage Doors to schedule your service and explore solutions tailored specifically for your home. Boost your security and convenience today for a worry-free tomorrow.
Frequently Asked Questions
How do I know if it’s time to upgrade my garage door opener?
Most garage door openers have a lifespan of 10 to 15 years. If your opener is approaching or exceeding this age, or if you’re experiencing safety or functionality issues, it’s time to consider an upgrade.
What factors should I consider when choosing a new garage door opener?
Key factors include motor power, drive mechanism (chain, belt, or screw), and advanced features like smart connectivity, battery backup, and safety sensors.
What is the difference between chain-drive and belt-drive garage door openers?
Chain-drive openers are economical and reliable, but they tend to be noisier. Belt-drive openers are quieter, making them suitable for homes with attached garages or living spaces nearby.
How can I test if my garage door opener’s safety features are functioning properly?
Perform an automatic reversal test by placing a 2×4 block in the door’s path and activating the closing mechanism. The door should reverse upon contact with the block, confirming that safety features are working correctly.