Garage door remotes seem simple until they stop working right when you need them to. Most people jump to the worst conclusions, dreading expensive repairs or replacement. Yet, nearly 90 percent of garage door remote failures are caused by something as basic as a dead battery or minor remote issue, not a broken opener. You might be surprised how quickly you can get things back on track with just a few quick checks.
Table of Contents
- Step 1: Check The Battery Of Your Garage Door Remote
- Step 2: Inspect The Remote Control For Damage
- Step 3: Reprogram Your Garage Door Remote
- Step 4: Verify Garage Door Opener Functionality
- Step 5: Test The Remote From Different Distances
Quick Summary
| Key Point | Explanation |
|---|---|
| 1. Check the remote battery first | Weak batteries are common culprits for non-responsive garage door remotes; replace them before further troubleshooting. |
| 2. Inspect for physical damage | Look for cracks, broken buttons, or corrosion that could affect remote performance; even minor damage can disrupt functionality. |
| 3. Reprogram the remote if needed | If issues persist after basic checks, reprogram the remote to ensure proper communication with the opener. |
| 4. Test the garage door opener | Use the wall control to verify the opener works well; a malfunction may lie within the opener rather than the remote. |
| 5. Conduct distance signal tests | Observe your remote’s effectiveness from various distances to identify potential signal interference or zones where performance drops. |
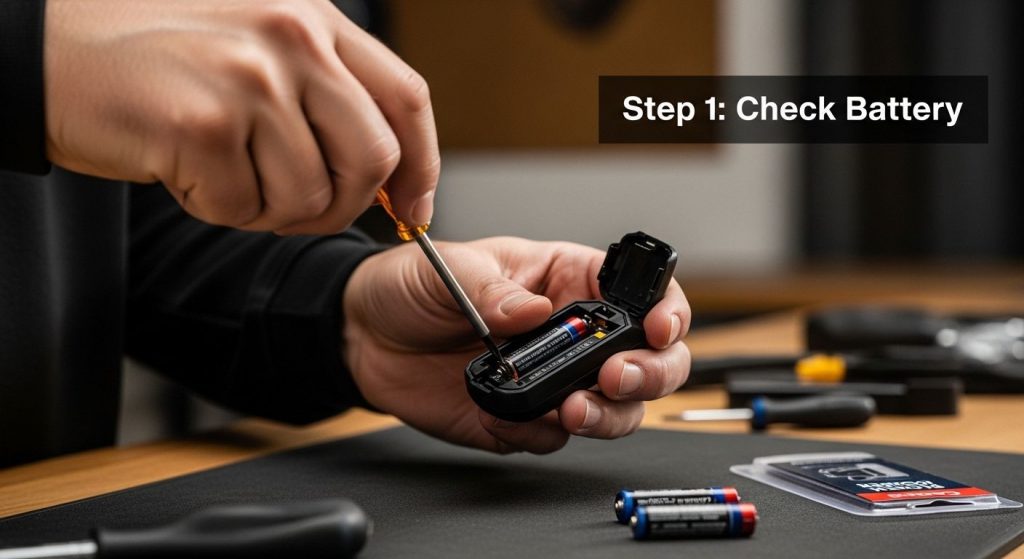
Step 1: Check the Battery of Your Garage Door Remote
When fixing garage door remote issues, the battery is often the most overlooked yet simplest component to troubleshoot. Many homeowners experience frustrating moments of their garage door failing to respond, only to discover that a weak battery is the root cause. Before diving into complex diagnostic procedures, start with this fundamental check that can save you time and unnecessary stress.
Identifying Battery Problems
Battery replacement is a straightforward process that requires minimal technical expertise. Most garage door remote controls use standard 9-volt or CR2032 lithium batteries, which are readily available at local hardware stores and supermarkets. To begin, remove the battery cover on the back of your remote. This typically involves sliding or pressing a small release mechanism. Carefully examine the existing battery for signs of corrosion, which appears as a white or greenish powdery substance around the battery terminals.
Once you have the battery exposed, inspect its condition closely. Significant indicators of battery failure include:
- Dim or non-functioning LED light when pressing buttons
- Inconsistent or weak signal transmission
- Complete lack of response from the garage door opener
- Visible battery corrosion or leakage
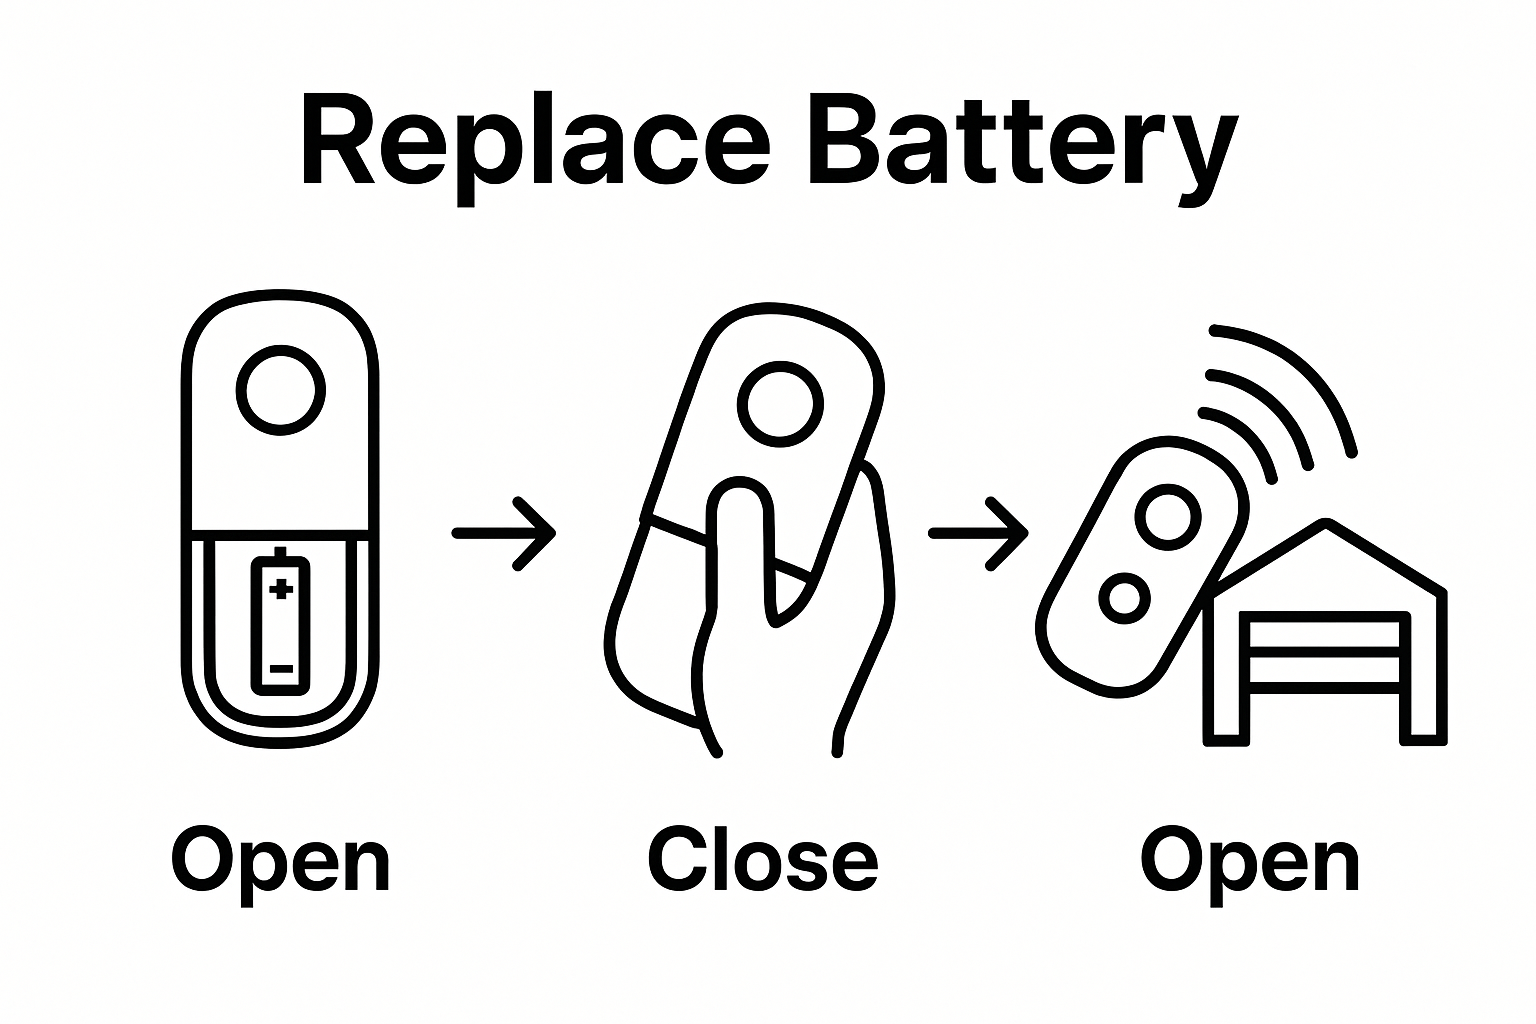
If you observe any of these symptoms, immediate battery replacement is recommended. When installing a new battery, ensure proper orientation by matching the positive (+) and negative (-) symbols. Gently insert the new battery, making sure it sits securely in the compartment. Replace the battery cover, ensuring it clicks firmly into place.
After replacing the battery, test your remote by standing within reasonable range of your garage door opener. Press the button and observe whether the door responds promptly and consistently. A successful battery replacement should restore your remote’s full functionality.
Below is an overview table summarizing the main troubleshooting steps for fixing garage door remote issues, including difficulty and expected outcomes, to help you quickly gauge what each step involves.
| Step | Difficulty | Key Outcome |
|---|---|---|
| Check the remote battery | Easy | Restores power and eliminates battery issues |
| Inspect for physical damage | Easy | Identifies or rules out physical malfunctions |
| Reprogram the remote | Moderate | Reestablishes communication with opener |
| Verify opener functionality | Easy | Confirms system works beyond the remote |
| Test remote at different ranges | Easy | Detects signal range/interference problems |
 Learn more about programming your garage door remote to ensure optimal performance after battery replacement.
Remember, battery issues are typically the simplest garage door remote problems to solve. By dedicating just a few minutes to this basic diagnostic step, you can often resolve communication issues between your remote and garage door opener without requiring professional intervention.
Step 2: Inspect the Remote Control for Damage
After addressing battery issues, the next critical step in fixing garage door remote issues involves a thorough physical inspection of the remote control itself. Physical damage can significantly impact your remote’s performance, potentially causing intermittent or complete signal failure. This comprehensive examination will help you identify potential problems that might prevent your garage door from functioning correctly.
Begin by carefully examining the exterior of your remote control under good lighting. Look for visible signs of wear and damage such as cracks, chips, or deep scratches on the plastic casing. Pay special attention to the areas around buttons and battery compartment, as these are most susceptible to stress and potential breakage. Slight cosmetic damage might seem insignificant, but even small compromises in the remote’s structural integrity can interfere with its electronic components.
Carefully test each button on the remote, noting any differences in responsiveness. Buttons that feel sticky, uneven, or require excessive pressure can indicate internal damage or accumulated debris. Gently press each button multiple times, observing whether they return to their original position smoothly. Some remotes develop internal spring mechanism issues that prevent consistent signal transmission. If buttons feel mushy or fail to spring back completely, this could explain your garage door’s communication problems.
Additional inspection points include checking the remote’s circuit board for signs of moisture damage or corrosion. This requires carefully opening the remote’s casing, which might void warranties on newer models. Signs of internal damage include:
- Greenish or white powdery residue around electronic connections
- Visible water stains or discoloration
- Warped or bent circuit board components
- Loose internal connections
If you discover significant damage, replacement is often more cost-effective than repair. Fortunately, most garage door remote controls are relatively inexpensive and easy to replace. Explore our guide on programming new garage door remotes to ensure smooth integration with your existing system.
Remember that prevention is key. Protect your remote from extreme temperatures, avoid dropping it, and keep it away from moisture. By conducting regular inspections and treating your garage door remote with care, you can extend its functional lifespan and prevent unexpected communication failures.
Here is a troubleshooting table summarizing common garage door remote problems, their possible causes, and recommended solutions as mentioned throughout the article.
| Problem | Possible Cause | Recommended Solution |
|---|---|---|
| Remote does not respond at all | Dead battery | Replace battery with correct type |
| Remote works intermittently | Weak battery or signal issue | Install new battery; check for interference |
| Buttons are sticky or unresponsive | Physical or internal damage | Inspect for debris or damage; clean or replace remote |
| Remote LED light is dim | Failing battery | Replace battery promptly |
| Remote works only at short distances | Signal interference or weak battery | Remove nearby electronic obstacles; replace battery |
| Door does not respond but wall control does | Remote malfunction or programming issue | Reprogram remote; replace if necessary |
| Visible corrosion inside battery compartment | Battery leakage or moisture | Clean corrosion; replace battery; replace remote if needed |
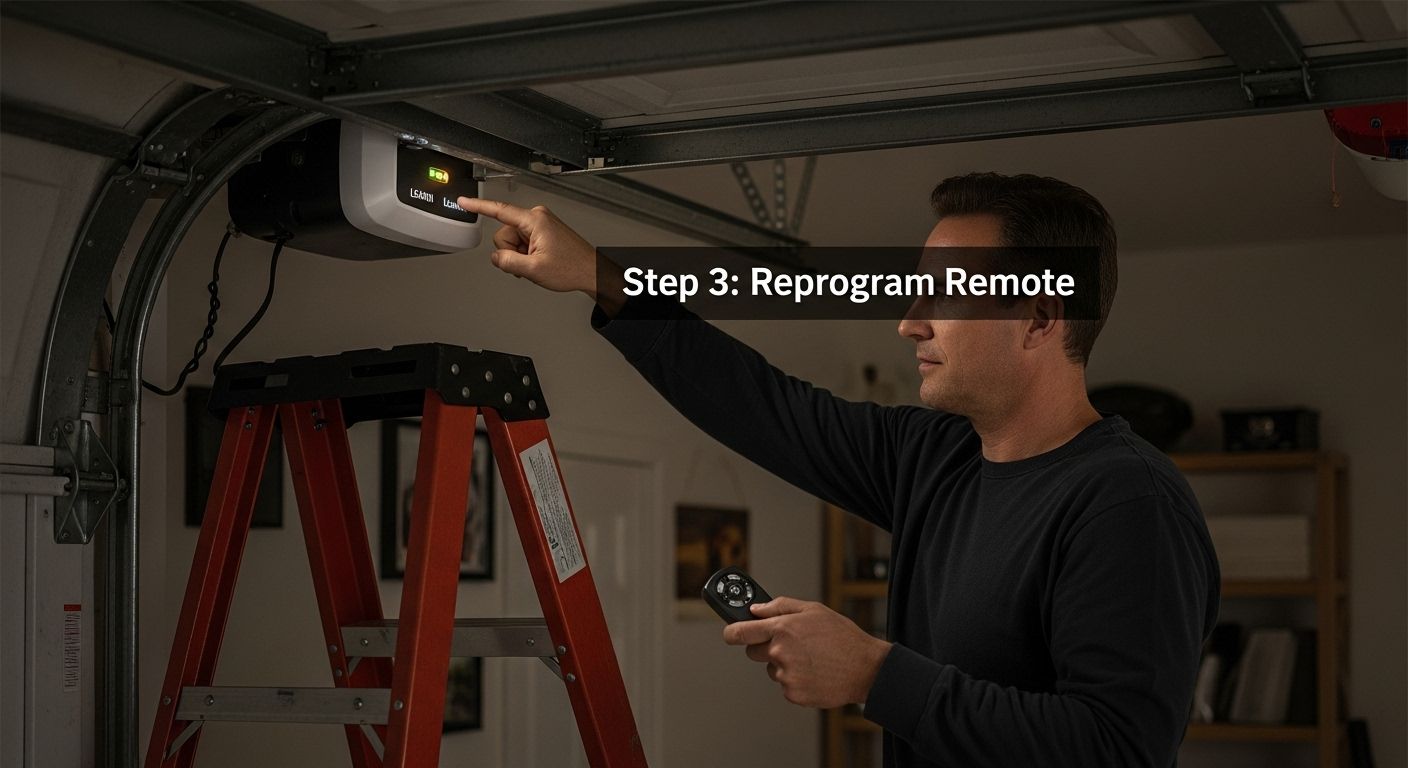
Step 3: Reprogram Your Garage Door Remote
When previous troubleshooting steps fail to resolve your garage door remote issues, reprogramming becomes a critical intervention. This process essentially reestablishes communication between your remote control and the garage door opener, clearing potential signal interference or memory glitches that might prevent proper functionality.
Begin by locating the learn or program button on your garage door opener. This small button is typically situated on the motor unit mounted on the ceiling of your garage, often near the antenna wire. The exact location varies depending on your opener’s manufacturer, so consult your owner’s manual if you cannot immediately identify it. Some models require accessing a panel or removing a cover to reveal the programming button.
Once you’ve located the learn button, follow these systematic steps:
- Climb a stable ladder to reach the garage door opener safely
- Press and hold the learn button for approximately 6-10 seconds
- Wait for a visual indicator like a blinking light or audible signal
- Return to your remote control and press the desired button you want to program
Some garage door opener models require a more nuanced approach. Older systems might need you to press the learn button briefly, while newer digital models could have more complex programming sequences. Pay close attention to the specific instructions for your garage door opener model. If you have multiple remotes, you might need to reprogram each one individually to ensure complete system synchronization.
After completing the programming sequence, test your remote by standing at various distances from the garage door. Press the button and observe whether the door responds consistently and promptly. A successful reprogramming should restore full communication between your remote and the opener.
 Check out our comprehensive guide for detailed remote programming techniques if you encounter any difficulties during this process.
If reprogramming does not resolve your remote issues, this might indicate a more complex problem with either the remote control or the garage door opener itself. In such cases, professional diagnostic services become necessary to identify and address underlying technical complications.
Step 4: Verify Garage Door Opener Functionality
After addressing remote control issues through previous troubleshooting steps, verifying the overall functionality of your garage door opener becomes crucial. This comprehensive assessment ensures that the problems you’ve encountered are indeed resolved and that your garage door system operates safely and efficiently.
Begin by conducting a systematic functionality test that examines both manual and remote-controlled operations. Start with the wall-mounted control panel inside your garage. Press the open and close buttons, carefully observing the door’s movement. Pay attention to any unusual sounds, jerky motions, or hesitation during the door’s travel. A properly functioning garage door should move smoothly and quietly, with consistent speed and no unexpected stops or reversals.
Next, perform a critical safety evaluation known as the force and reversal test. This involves checking the door’s ability to detect and respond to potential obstructions. Place a sturdy object like a rolled-up towel or a small cardboard box in the door’s path as it closes. A correctly functioning garage door opener should immediately stop and reverse direction when it encounters this obstacle.
If the door fails to reverse or shows delayed response, this indicates a potentially dangerous malfunction that requires immediate professional attention.
Additional verification points include:
- Testing all remote controls to ensure consistent operation
- Checking the alignment of safety sensors near the bottom of the garage door
- Listening for any grinding, scraping, or unusual mechanical sounds
- Verifying that the door opens and closes completely without interruption
Pay special attention to the opener’s response time and consistency. A well-functioning system should respond to commands within 1-2 seconds, with smooth and predictable movement. Intermittent performance or delayed responses might suggest underlying electrical or mechanical issues that extend beyond simple remote control problems.
Learn more about professional garage door opener diagnostics if you notice persistent irregularities during your functionality test. While many issues can be resolved through careful troubleshooting, some problems require expert intervention to ensure the safety and reliability of your garage door system. Remember that regular maintenance and prompt attention to potential issues can significantly extend the lifespan of your garage door opener and prevent more costly repairs down the line.
Step 5: Test the Remote from Different Distances
Fixing garage door remote issues requires a comprehensive understanding of your system’s signal transmission capabilities. Testing your remote’s performance across various distances provides critical insights into potential communication problems that might not be immediately apparent during closer-range operations.
Begin your distance testing systematically by starting near the garage door and progressively moving further away. Position yourself first within 10 feet of the opener, then gradually increase your distance in 10-foot increments. Press the remote’s button at each distance, carefully observing the garage door’s response time and consistency. A properly functioning remote should activate the door smoothly regardless of your proximity, with minimal delay between button press and door movement.
Pay special attention to potential signal interference zones around your property. Walls, metal objects, and electronic devices can create unexpected barriers that disrupt your remote’s transmission. Walk around different areas near your garage, testing the remote’s effectiveness from various angles. Look for specific locations where the signal becomes weak or inconsistent. This methodical approach helps identify potential dead zones or areas with compromised signal strength.
Additional testing considerations include:
- Testing from different elevations (ground level, driveway, street)
- Checking performance through windows and from inside vehicles
- Verifying signal consistency during different times of day
- Noting any environmental factors that might impact transmission
Signal strength variations can reveal underlying technical issues that might require more advanced troubleshooting. If you notice significant performance differences between short and long distances, this could indicate problems with your remote’s transmitter, the garage door opener’s receiver, or potential interference from nearby electronic devices. Explore our comprehensive guide on remote programming techniques to help diagnose and resolve persistent signal challenges.
Successful distance testing means your remote consistently activates the garage door from multiple locations with reliable, immediate response. Any noticeable inconsistencies suggest the need for further investigation, potentially involving professional diagnostic services to ensure your garage door system operates at peak performance.
End Remote Frustration—Trust Seattle’s Experts for Quick, Reliable Garage Door Solutions
Tired of troubleshooting your garage door remote and still facing doors that just will not open? You are not alone. Many homeowners deal with battery headaches, unresponsive remotes, signal issues, and confusing reprogramming steps. If following every step still leaves you stuck, it is time to get professional help that guarantees fast results and lasting peace of mind.

Do not let technical issues disrupt your security or daily routine. At Summit Garage Doors, our trusted technicians have helped solve garage door remote problems across Seattle since 2013. We understand the urgency and offer prompt repairs, expert remote programming, and tailored solutions for all types of garage doors.
Visit Summit Garage Doors online or contact us today for professional service you can count on. If you want to learn more about how we bridge the gap between DIY fixes and expert care, explore our guide to programming new garage door remotes or discover when it is time to upgrade your entire garage door opener system. Let us help you get back to smooth, worry-free access—reach out now for fast, friendly assistance.
Frequently Asked Questions
What are common signs that my garage door remote battery needs to be replaced?
A weak battery often results in a dim LED light, inconsistent signal transmission, or a complete lack of response from the remote. If you notice these issues, it may be time for a battery replacement.
How can I check if my garage door remote is physically damaged?
Inspect the remote for cracks, chips, or damage, especially around the buttons and battery compartment. Test each button for responsiveness; sticky or uneven buttons may indicate internal damage.
What steps should I take to reprogram my garage door remote?
To reprogram, locate the learn button on your garage door opener and hold it for 6-10 seconds until you see a visual indicator. Then, press the button on your remote that you want to program. Consult your owner’s manual for specific instructions relevant to your model.
How can I test my garage door remote from different distances?
Start by testing the remote within 10 feet of the opener and gradually increase the distance in 10-foot increments. Observe the remote’s effectiveness at each distance, noting any inconsistencies that may indicate signal interference or other issues.