Most people overlook their garage door until something goes wrong, but this humble piece of hardware is more important than you think. Studies show that garage doors can be the first point of failure in over 80 percent of home structural losses during natural disasters. And here is the surprise. Reinforcing your garage door does not take expensive upgrades or major overhauls. Small, targeted improvements can transform your garage door into one of the strongest defenses your home has.
Table of Contents
- Step 1: Assess Your Current Garage Door Setup
- Step 2: Identify Weak Points and Vulnerabilities
- Step 3: Gather Necessary Tools and Materials
- Step 4: Install Reinforcements Strategically
- Step 5: Test for Security and Stability
- Step 6: Perform Regular Maintenance Checks
Quick Summary
| Key Point | Explanation |
|---|---|
| 1. Thoroughly inspect your garage door | Evaluate for wear, damage, and loose connections to identify vulnerabilities and develop a reinforcement strategy. |
| 2. Identify connection weaknesses | Examine attachment points, brackets, and tracks that may fail under stress, focusing on structural integrity during storms. |
| 3. Gather appropriate tools and materials | Assemble a toolkit with necessary safety gear and high-quality reinforcement materials tailored to your garage door’s specifications. |
| 4. Apply reinforcements strategically | Install vertical and horizontal supports with precise fastening techniques to enhance stability and resistance against external pressure. |
| 5. Conduct regular maintenance checks | Implement a quarterly schedule for detailed inspections, lubrications, and tests to preserve structural integrity and function. |
Step 1: Assess Your Current Garage Door Setup
Understanding the current condition of your garage door is the critical first step in effective reinforcement. A comprehensive assessment helps you identify potential vulnerabilities and develop a targeted strategy for strengthening your garage door’s structural integrity. Before diving into reinforcement techniques, you need a systematic approach to evaluate your existing setup.
Start by conducting a thorough visual inspection of your entire garage door system. Look carefully at the door panels, checking for signs of wear, damage, or stress points that might compromise the door’s strength. Pay special attention to areas where panels connect, examining for loose connections, rust spots, or visible warping. Your inspection should cover both the interior and exterior surfaces, as damage can develop differently on each side.
Measure the thickness and material of your current door panels, as this will inform your reinforcement strategy. Older or thinner steel doors typically require more extensive reinforcement compared to newer, more robust models. The comprehensive garage door assessment guide can provide additional insights into evaluating door materials and structural conditions.
Test the door’s balance and operational smoothness by manually lifting the door halfway and releasing it. A properly balanced door should remain in place without dropping or rising. If the door falls or shoots upward, this indicates potential spring tension issues or structural imbalances that need immediate professional attention. Uneven movement suggests underlying problems that could compromise your reinforcement efforts.
Document your findings meticulously. Take clear photographs of any damaged areas, measure panel dimensions, and note the door’s age and current manufacturer. This documentation will serve as a crucial reference point for subsequent reinforcement steps and help you communicate effectively with professional technicians if additional expertise is required.
Successful assessment means you have a clear understanding of your garage door’s current condition, potential weak points, and specific reinforcement needs. By completing this initial evaluation, you’re setting the foundation for a more secure and resilient garage door system.
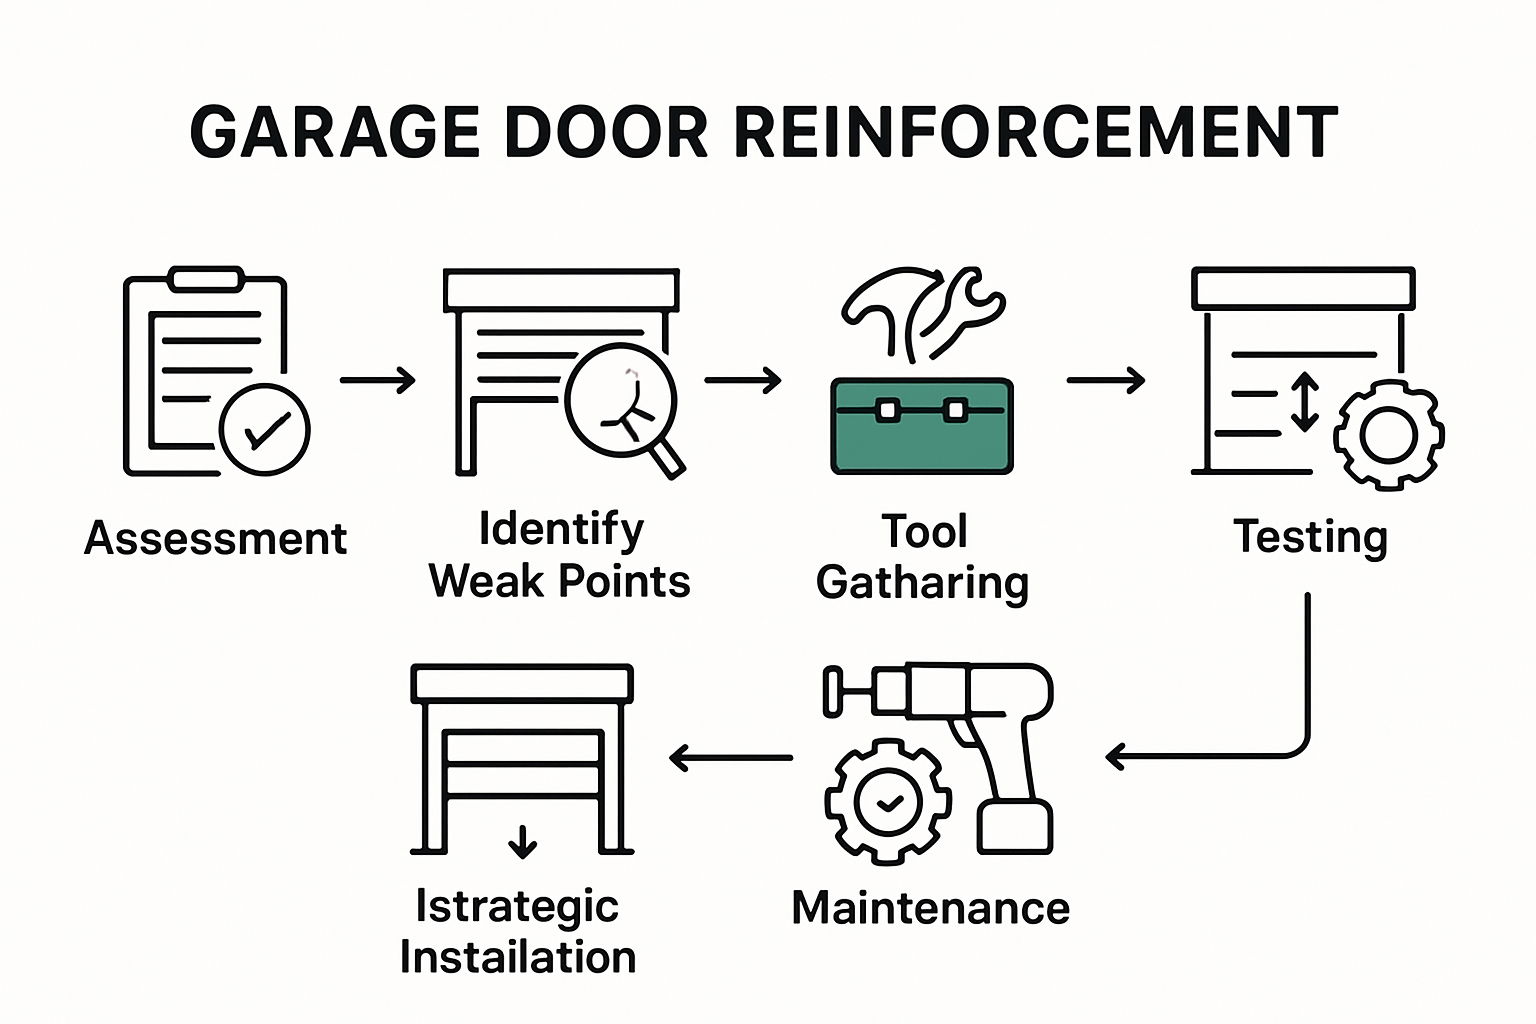
The following table provides a step-by-step overview of the garage door reinforcement process, summarizing the focus for each step and the intended outcome.
| Step | Main Focus | Key Outcome |
|---|---|---|
| 1. Assess Current Garage Door Setup | Inspection & documentation | Identify vulnerabilities |
| 2. Identify Weak Points & Vulnerabilities | Examine attachment & bracing | Map structural weak spots |
| 3. Gather Tools and Materials | Assemble needed resources | Be fully prepared for reinforcement |
| 4. Install Reinforcements Strategically | Add supports & fasteners | Improve stability and resistance |
| 5. Test for Security and Stability | Manual & structural testing | Confirm improved integrity and function |
| 6. Perform Regular Maintenance Checks | Ongoing inspections & adjustments | Maintain reinforcement and long-term safety |
Step 2: Identify Weak Points and Vulnerabilities
Identifying potential weaknesses in your garage door system is a critical step that goes beyond simple visual inspection. Understanding these vulnerabilities allows you to develop a targeted reinforcement strategy that protects your home and ensures long-term structural integrity. This comprehensive assessment requires a methodical approach to uncovering potential structural risks.
Begin by examining the connection points between your garage door panels and the surrounding frame. Weak attachment mechanisms are often the first point of structural failure during high wind events or significant mechanical stress. Check the mounting brackets, examining how securely they are fastened to both the door panels and the wall structure. Look for signs of rust, loosened bolts, or gaps that might indicate compromised connections. Pay special attention to the bottom rail and side tracks, as these areas frequently experience significant structural strain.
According to research from FEMA, garage doors represent a critical vulnerability in home structural integrity. Carefully assess the door’s horizontal and vertical bracing, which plays a crucial role in maintaining overall stability. Older garage doors or those with minimal internal reinforcement are particularly susceptible to potential failure during extreme weather conditions. Test the door’s rigidity by gently pressing against different panel sections, noting any areas that seem excessively flexible or show signs of warping.
Measure the thickness of your door panels and examine the material composition. Thin or single-layer panels are more prone to structural compromise compared to multi-layered or reinforced designs. Metal doors with visible signs of corrosion or wooden doors with moisture damage require immediate attention. Look for subtle indicators like uneven panel alignment, unusual bending, or visible stress marks that might not be immediately apparent during a casual inspection.
Document your findings meticulously, creating a detailed map of potential weak points. Take clear photographs of areas of concern, noting specific measurements and observations. This comprehensive documentation will serve as a critical reference point for your subsequent reinforcement efforts and provide valuable information if you decide to consult professional technicians. By thoroughly identifying vulnerabilities, you’re taking a proactive approach to protecting your home’s structural integrity and ensuring the long-term reliability of your garage door system.
Step 3: Gather Necessary Tools and Materials
Successful garage door reinforcement requires careful preparation and the right collection of tools and materials. This crucial step sets the foundation for a safe and effective reinforcement project, ensuring you have everything needed to complete the job efficiently and professionally. Preparation is more than just gathering random tools it is about selecting the precise equipment that matches your specific garage door’s requirements.
Begin by assembling a comprehensive toolkit that includes both standard and specialized equipment. Essential hand tools are fundamental to your reinforcement project. You will need a reliable power drill with multiple drill bit sizes, a sturdy socket wrench set, adjustable wrenches, a measuring tape, and a level. Safety equipment is equally important. Protective gear should include work gloves, safety glasses, and a sturdy ladder that can support your weight while allowing safe access to different parts of the garage door mechanism.
According to guidance from the Federal Alliance for Safe Homes, specific reinforcement materials are critical for a successful project. Stock up on high-quality steel reinforcement struts, heavy-duty mounting brackets, and rust-resistant hardware. Select materials that match your door’s specific dimensions and weight requirements. For wooden garage doors, you might need additional wood bracing materials, while metal doors require specialized steel reinforcement strips. Galvanized or stainless steel components offer superior durability and resistance to environmental degradation.
Carefully inventory the materials you have collected, creating a detailed checklist to ensure nothing is overlooked. Consider purchasing extra fasteners and backup hardware, as unexpected challenges can arise during the reinforcement process. Professional-grade materials might seem more expensive initially, but they provide long-term protection and reduce the likelihood of future repairs. Take time to compare different material grades, understanding the trade-offs between cost and quality.
Prepare a clean, organized workspace near your garage door where you can lay out tools and materials systematically. This approach minimizes disruption and helps you work more efficiently. Double-check that all tools are in good working condition, with no signs of damage or excessive wear. By meticulously preparing your tools and materials, you are setting the stage for a successful garage door reinforcement project that will enhance your home’s structural integrity and provide peace of mind.
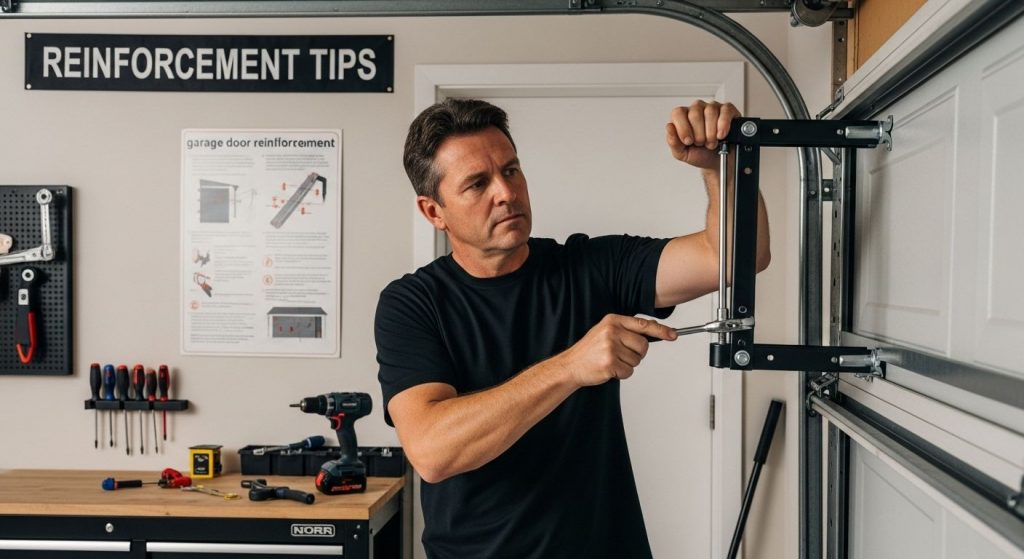
Step 4: Install Reinforcements Strategically
Strategic reinforcement transforms a vulnerable garage door into a robust structural element of your home. This critical step requires precision, patience, and a methodical approach to ensure maximum protection and longevity. Your goal is to systematically strengthen the door’s most vulnerable points, creating a unified and resilient system that can withstand significant environmental stresses.
Begin by focusing on the door’s vertical and horizontal support structures. Vertical reinforcement struts are your primary defense against structural weakness. Install these metal or heavy-duty support bars along the door’s center and at critical panel intersections. Each strut should be securely fastened using high-grade bolts, ensuring a tight connection that distributes mechanical stress evenly across the door’s surface. Pay special attention to the mounting points, checking that each connection is level and provides uniform support.
According to research from the Insurance Institute for Business and Home Safety, strategic reinforcement is crucial in protecting homes from severe weather events. When installing reinforcement hardware, use galvanized or stainless steel brackets that resist corrosion and maintain structural integrity over time. Ensure each bracket is secured with multiple fasteners, creating a robust connection point that can withstand significant external pressure.
Focus on the bottom rail and side tracks, as these areas experience the most mechanical stress during door operation. Reinforce these sections with additional mounting brackets and check for any signs of misalignment. The bottom rail, in particular, requires extra attention. Install heavy-duty rollers and ensure the track is perfectly straight, with no variations that could cause uneven wear or potential failure points. Test the door’s movement after each reinforcement installation, making subtle adjustments to maintain smooth operational characteristics.
Carefully document your reinforcement process, taking photographs of each installation step and noting the specific hardware used. This documentation serves multiple purposes: it provides a reference for future maintenance, helps track the improvements made, and can be valuable for insurance purposes. By approaching garage door reinforcement as a comprehensive and strategic process, you are investing in your home’s long-term structural resilience and protection against potential environmental challenges.
Step 5: Test for Security and Stability
Testing your newly reinforced garage door is a critical final step that validates the effectiveness of your reinforcement efforts. This comprehensive evaluation ensures that your modifications have not only improved the door’s structural integrity but also maintained its essential functional characteristics. A thorough testing process goes beyond simple visual inspection, requiring systematic and methodical verification of multiple performance aspects.
Begin with a manual operational test, carefully lifting and lowering the door by hand to assess its balance and smooth movement. Pay close attention to resistance points and any unusual sounds or movements that might indicate misalignment or improper reinforcement. The door should move evenly, without catching or binding at any point. Observe how the reinforcement struts interact with the existing door panels, ensuring they provide support without creating additional friction or resistance.
Perform a comprehensive stability test by simulating different stress scenarios. Gently apply pressure to various sections of the door, checking for uniform rigidity and structural integrity. Use your body weight carefully to test the strength of new mounting points and reinforcement struts. Listen for any creaking or unusual sounds that might indicate potential weak spots or improper installation. The goal is to create a door that feels solid and immovable, with no unexpected flexibility or movement.
The garage door replacement process guide recommends conducting a detailed mechanical assessment. Verify that all hardware remains securely fastened after your reinforcement efforts. Check the tension of springs, the alignment of tracks, and the smooth operation of rollers. Use a level to confirm that mounting brackets remain perfectly aligned and that the door maintains its intended geometric shape under various operational conditions.
Document your testing process meticulously, recording any observations or potential areas of concern. Take videos and photographs that capture the door’s movement and stability, creating a comprehensive record of your reinforcement project. This documentation serves multiple purposes: it provides a baseline for future maintenance, offers proof of your improvements, and helps identify any subtle issues that might require additional attention. By conducting a rigorous testing process, you transform your garage door reinforcement from a theoretical improvement to a proven enhancement of your home’s structural security.
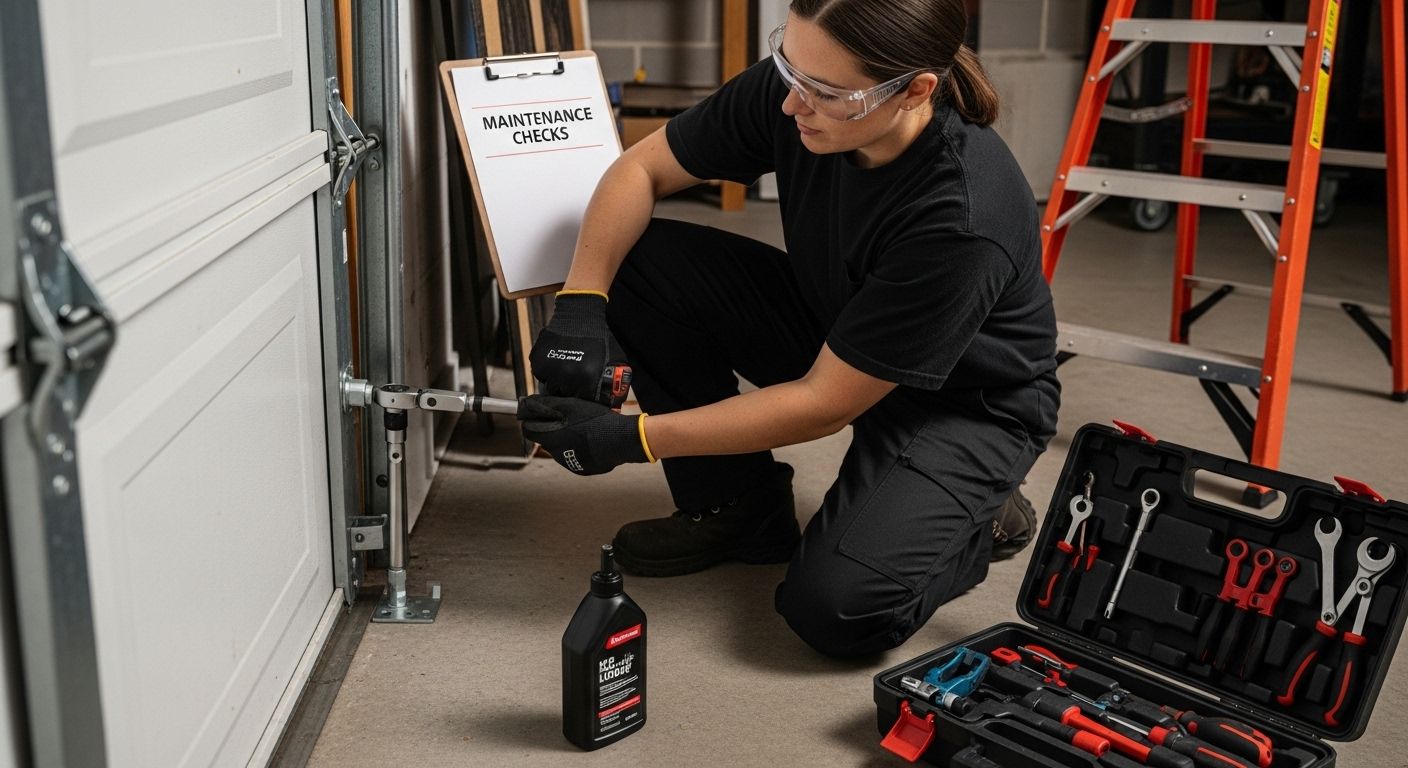
Step 6: Perform Regular Maintenance Checks
Regular maintenance is the cornerstone of preserving your garage door’s reinforcement efforts and ensuring long-term structural integrity. This ongoing process involves systematic inspections and proactive care that prevent potential failures and extend the life of your reinforced garage door. Think of maintenance as an investment in your home’s security and functionality, not just a periodic chore.
Establish a consistent maintenance schedule that includes quarterly comprehensive inspections. Visual and physical examinations are crucial during these checks. Carefully examine all reinforcement points, looking for signs of rust, loosening hardware, or subtle structural changes. Run your hands along the reinforcement struts, feeling for any irregularities or developing weak spots. Pay special attention to areas where new brackets and supports were installed, as these connections can experience stress over time.
Check the mechanical components with precision. Lubricate moving parts like rollers, hinges, and tracks using a high-quality silicone-based lubricant. Tighten all visible bolts and fasteners, ensuring they remain secure but not overly compressed. Your garage door maintenance guide recommends using a torque wrench to apply consistent and appropriate pressure when tightening hardware, preventing potential damage from over-tightening.
Perform a comprehensive operational test during each maintenance session. Open and close the door manually and with the automatic opener, observing its movement carefully. Listen for unusual sounds, watch for any hesitation or uneven motion, and check that the door remains balanced throughout its travel. Test the door’s manual release mechanism to ensure it functions smoothly, which is critical during potential power outages or emergency situations. Document your findings in a maintenance log, recording the date of inspection, observations, and any actions taken.
Remember that maintenance is an ongoing commitment. Weather conditions, frequent use, and environmental factors can gradually impact your garage door’s reinforcement. By dedicating time to regular, thorough checks, you protect your initial investment and maintain the structural improvements you’ve carefully implemented. Consistent maintenance transforms your reinforcement project from a one-time upgrade to a lasting solution for your garage door’s security and performance.
Reinforce Your Garage Door With Seattle’s Trusted Experts
Have you spotted weak points, structural issues, or outdated reinforcement on your garage door? Many Seattle homeowners feel anxious about hidden problems in their garage door system, especially after spotting stress points or uncertain about the door’s ability to withstand storms or years of wear. As highlighted in our guide, missing reinforcements, worn hardware, and improper maintenance can expose your property to security threats and costly future repairs. Knowing what needs improvement is only useful if you can trust the work to be done right.

Protect your home and feel confident with help from the professionals at Summit Garage Doors. Our technicians bring over a decade of experience in tailored garage door installations, precision repairs, and structural reinforcements for every type of home in the Greater Seattle area. Instead of worrying about hidden vulnerabilities, let our team deliver proven solutions designed for lasting security. Ready to reinforce your garage door the right way? Schedule your consultation today, see quick results, and experience true peace of mind. Don’t delay—secure your home before the next season arrives.
Frequently Asked Questions
What are the signs that my garage door needs reinforcement?
A garage door may need reinforcement if you notice signs of wear such as rust, warped panels, or difficulty in operation. Unbalanced movement when manually lifting the door and visible stress points can also indicate vulnerabilities that require attention.
How can I assess the structural integrity of my garage door?
To assess your garage door’s integrity, conduct a visual inspection for any damage or wear, check the attachment points and mounting brackets for security, and test the door’s balance by lifting it halfway to see if it stays in place.
What materials are best for reinforcing a garage door?
High-quality steel reinforcement struts, heavy-duty mounting brackets, and rust-resistant hardware are ideal for garage door reinforcement. Choose materials that are compatible with your door’s thickness and weight, ensuring long-term durability and structural integrity.
How often should I perform maintenance checks on my reinforced garage door?
It is recommended to perform maintenance checks on your reinforced garage door quarterly. Regular inspections help identify any signs of wear, ensure that all components are secure, and maintain the door’s overall function and security.
Recommended
- DIY Garage Door Repairs: Seattle Homeowners’ 2025 Guide – Summit Garage Doors | Seattle’s #1 Garage Door Repair & Installation
- Understanding Garage Door System Components in Seattle 2025 – Summit Garage Doors | Seattle’s #1 Garage Door Repair & Installation
- Timely Garage Door Maintenance Tips for Seattle Homeowners 2025 – Summit Garage Doors | Seattle’s #1 Garage Door Repair & Installation
- Seattle Garage Door Service Tips for Homeowners 2025 – Summit Garage Doors | Seattle’s #1 Garage Door Repair & Installation
- 10 Essential Shutter Security Features for a Safer Home Environment
- How to Avoid Underinsurance: Tips for SA Car and Home Owners 2025 – Savvy Insurance