Did you know that over 20,000 injuries occur each year due to garage door accidents in the United States? Fixing garage door sensors can make a big difference in your home’s safety and prevent serious mishaps. Understanding how to troubleshoot and repair these sensors will help keep your garage door running smoothly and give you confidence in your own repair skills without waiting for costly professional help.
Quick Summary
| Key Point | Explanation |
|---|---|
| 1. Gather essential tools for safety | Use work gloves, safety glasses, and a step ladder to protect yourself during repairs. Always prioritize safety when working on electrical systems. |
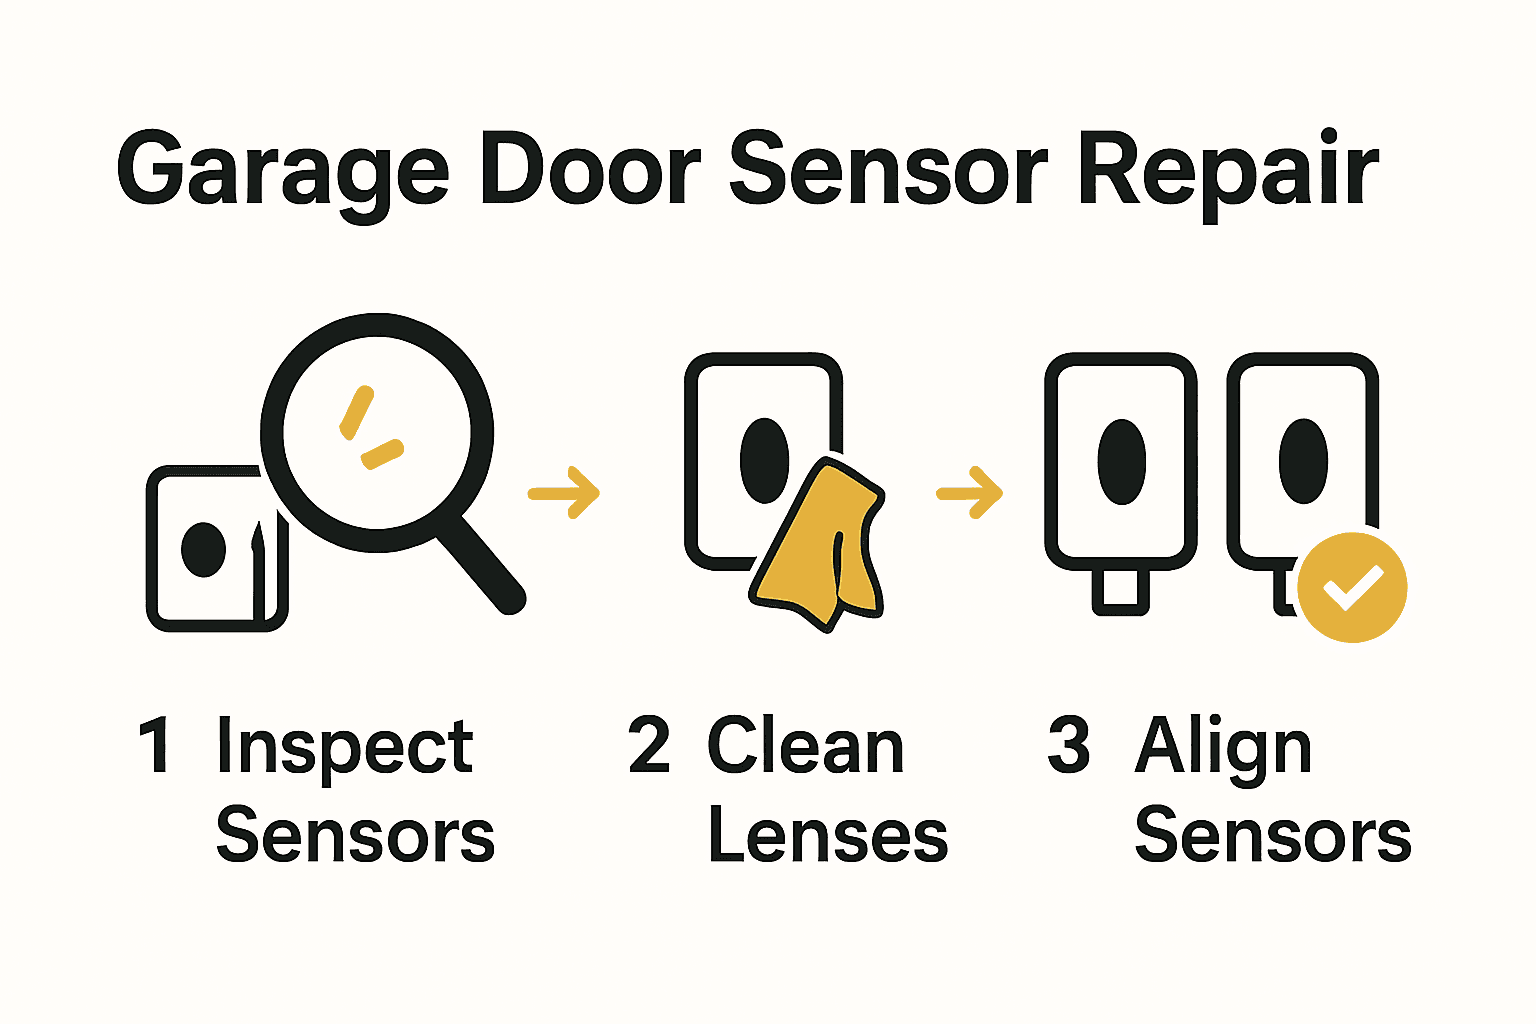
| 2. Inspect sensors for common issues | Look for symptoms like blinking lights or door malfunctions. Visual checks can help diagnose potential sensor problems before making repairs. |
| 3. Clean sensor lenses thoroughly | Gently wipe down sensors with a soft cloth to remove dust and cobwebs, ensuring optimal performance. Regular cleaning prevents future issues. |
| 4. Align sensors properly | Ensure sensors face each other and are mounted at the same height. Correct alignment is vital for the sensors to function correctly. |
| 5. Test functionality after repairs | Conduct obstruction tests with a wooden block to confirm sensors detect correctly. If they fail, seek professional assistance to address safety risks. |
Table of Contents
- Step 1: Gather Necessary Tools And Ensure Safety
- Step 2: Inspect And Diagnose Sensor Issues
- Step 3: Clean Garage Door Sensors Thoroughly
- Step 4: Realign Misaligned Sensors Carefully
- Step 5: Test Sensor Functionality And Adjust
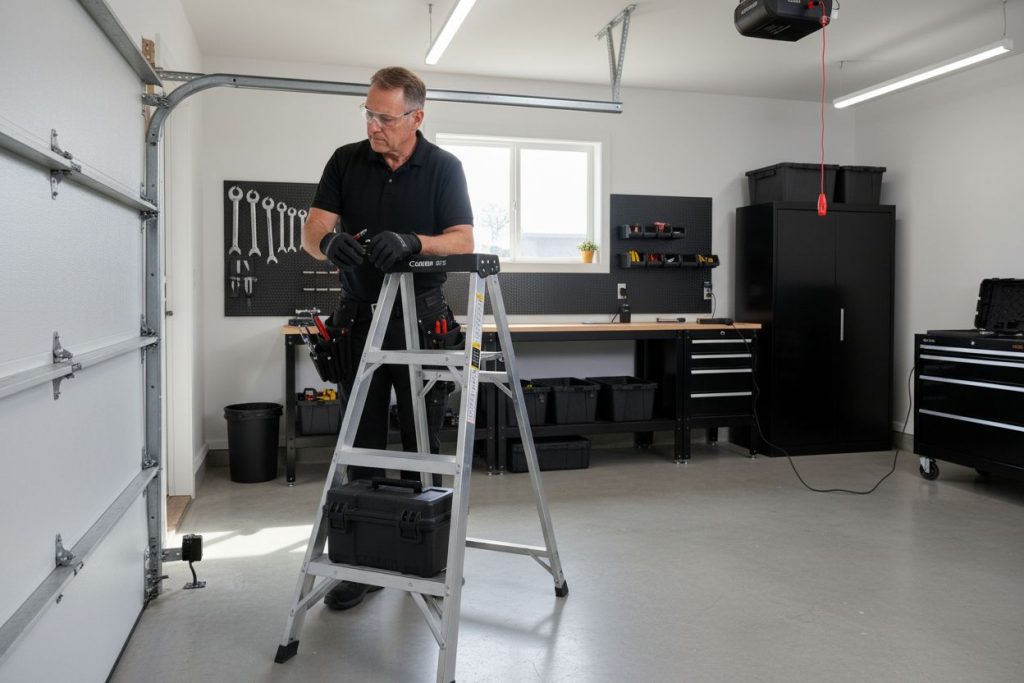
Step 1: Gather Necessary Tools and Ensure Safety
Before diving into sensor repair, you’ll want to create a safe workspace with all the right equipment. Think of this as your garage door sensor repair mission prep.
First things first. According to Today’s Homeowner, you’ll need some specific tools to get the job done right. Grab your work gloves for protection and safety glasses to shield your eyes. You’ll also want a sturdy step ladder to reach those sensors safely, plus pliers and wire cutters for any necessary adjustments.
Safety is paramount when working with electrical systems. Unplug your garage door opener before starting any repair work. This simple step prevents accidental electrical issues and protects you from potential shocks. Pro tip from the experts: always treat electrical components with respect.
As Elite Garage Lynnwood recommends, familiarize yourself with the manual release handle (that red cord hanging from your opener). While not directly related to sensor repair, knowing how to manually operate your door can be crucial during power outages or if your opener fails.
Quick checklist of must have tools:
• Work gloves
• Safety glasses
• Step ladder
• Pliers
• Wire cutters
• Patience and careful attention
Ready to move forward? Take a deep breath and make sure your workspace is clear and organized. In the next step, we’ll start diagnosing those sensor issues and getting your garage door back to smooth operation.
Step 2: Inspect and Diagnose Sensor Issues
Now that you’ve got your tools ready, it’s time to play detective with your garage door sensors. Your mission is to understand exactly what might be preventing your garage door from operating smoothly.
According to Garage Up First Coast, there are several telltale signs that your sensors might be acting up. Watch for symptoms like your door only closing when you hold down the wall button, blinking sensor lights, unexpected door reversing, or your remote suddenly refusing to work.
Rock Garage Door recommends starting with a visual inspection. Look closely at the sensor indicator lights. Are they steady? Blinking? Or completely off? These lights are your first clue in diagnosing potential problems.
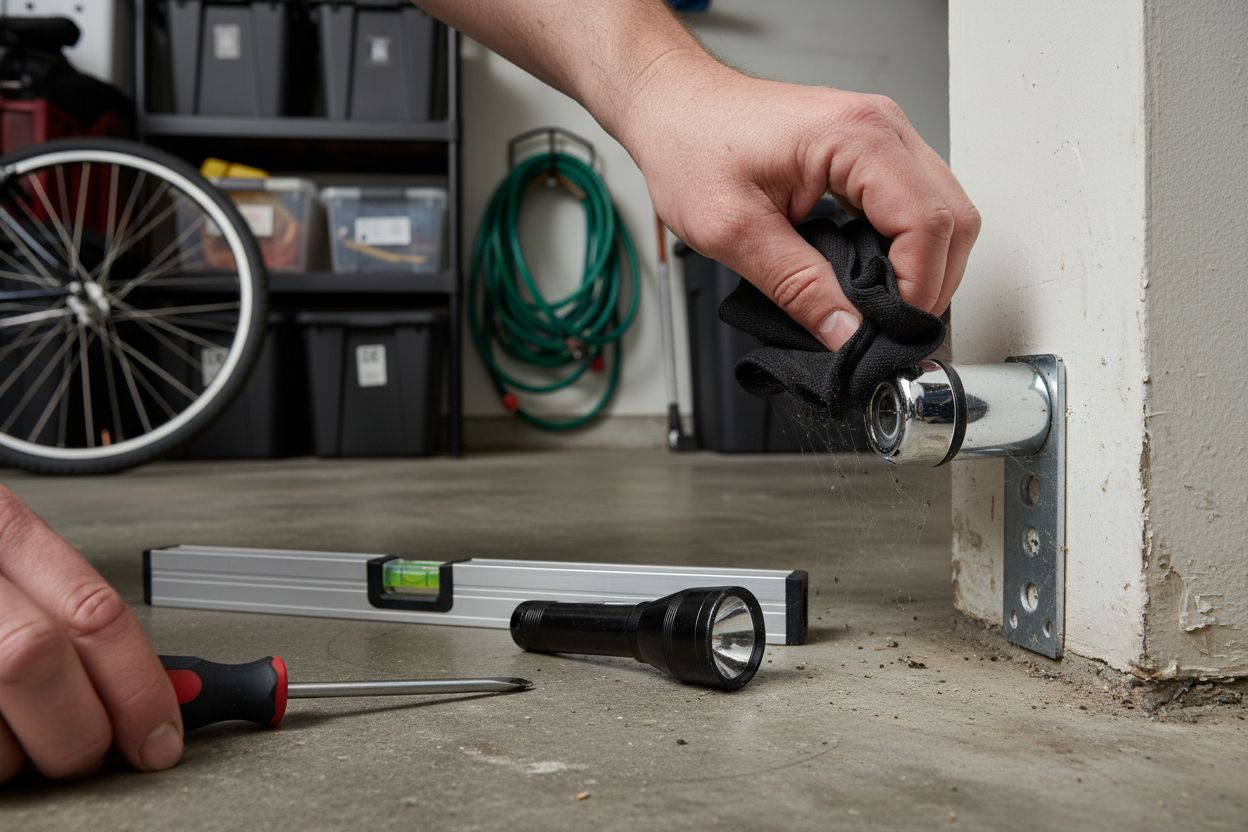
Cleaning the sensor lenses is often an overlooked but crucial step. Dust, dirt, and cobwebs can interfere with sensor performance. Take a soft cloth and gently wipe down both sensor units carefully. Be sure not to scratch the lenses or use any harsh cleaning chemicals.
Next, check the sensor alignment. They should be facing each other perfectly and mounted at the same height. A slight misalignment can cause your garage door to behave erratically. Use your level or a measuring tape to ensure both sensors are precisely positioned.
Quick warning: Inspect the sensor wires for any signs of damage. Frayed or disconnected wires can completely disable your sensor system. If you spot any wire issues, you might need professional help.
Ready to take the next step? If these initial checks don’t solve your problem, we’ll dive deeper into troubleshooting and potential repairs in the upcoming sections.
Here’s a summary of common garage door sensor issues and diagnostic steps:
| Symptom | Possible Cause | Inspection Step |
|---|---|---|
| Door won’t close (hold button) | Misaligned sensors Obstruction |
Check alignment Remove obstructions |
| Blinking sensor lights | Dirty lenses Sunlight interference |
Clean lenses Check sunlight angle |
| Door reverses unexpectedly | Misalignment Damaged wires |
Inspect brackets Check wiring |
| Indicators off | Power issue Disconnected wires |
Verify power Tighten connections |
| Remote not working | Sensor communication fault | Test with different objects |
Step 3: Clean Garage Door Sensors Thoroughly
Time to give your garage door sensors a spa treatment. Cleaning these tiny but critical components can often solve mysterious performance issues and get your garage door running smoothly again.
According to Today’s Homeowner, sensor cleaning is a straightforward process that you can absolutely do yourself. Start by grabbing a soft lint-free cloth. This isn’t the time for paper towels or rough rags that might scratch delicate surfaces.
Rock Garage Door emphasizes how dirt, dust, and cobwebs can easily obstruct sensor beams. Gently wipe each sensor lens with your soft cloth. Think of it like cleaning delicate eyeglasses. Use light, careful motions to remove any accumulated grime without applying too much pressure.
Pay special attention to the metal mounting brackets. If you notice any moisture during your cleaning, take a moment to dry these areas thoroughly. Moisture can interfere with sensor performance and potentially cause electrical issues.
Quick pro tip: Annual cleaning keeps your sensors in top shape. Think of it like an annual checkup for your garage door system. Consistent maintenance prevents bigger problems down the road.
Read more about maintaining garage door safety features to ensure your entire system remains in peak condition.
Ready to test your handiwork? In the next section, we’ll walk through verifying that your cleaning has resolved the sensor issues and restored your garage door’s smooth operation.
Step 4: Realign Misaligned Sensors Carefully
Sensors acting like they are playing a game of ‘not quite pointing at each other’? Time to bring precision back to your garage door system and get those sensors working perfectly.
According to Garage.com, proper sensor alignment is crucial. The goal is getting those LED indicator lights to show solid green instead of blinking or flickering. You’ll want to focus on two key things: placement height and direct facing position.
Start by checking your sensor placement. The Handy Geeks recommend positioning sensors 4 to 6 inches off the ground. Break out your measuring tape and ensure both sensors sit at exactly the same height. Precision matters here.
Loosen the mounting brackets slightly so you can make small adjustments. Gently move each sensor until they are directly facing each other. Watch those LED lights. When they turn solid instead of blinking, you know you are on the right track.
A pro tip from the experts: be mindful of sunlight. Direct sun glare can interfere with sensor performance. If you notice persistent alignment issues, consider slight angle adjustments or read more about maintaining garage door safety features for additional troubleshooting strategies.
Once aligned, tighten those mounting brackets carefully. Do not overtighten and risk damaging the delicate sensor components. A snug fit is what you are aiming for.
Ready to test your handiwork? The next section will walk you through verifying that your alignment has solved the sensor communication issues.
Step 5: Test Sensor Functionality and Adjust
You’ve cleaned and aligned your sensors. Now comes the moment of truth: testing to ensure everything works perfectly. Think of this as your garage door sensor final exam.
The Handy Geeks recommend a simple but effective safety test. Place a 2×4 wooden block directly under the closing garage door. When functioning correctly, your sensors should immediately detect the obstruction and stop the door from closing.
According to Raynor Door Authority, a monthly maintenance routine helps keep your sensors in top shape. Start by checking the LED indicators. They should display solid lights when aligned correctly. Blinking or off lights signal potential ongoing issues.
Try multiple test scenarios. Use different objects like a towel or cardboard box to confirm the sensors consistently detect obstructions. Your garage door should reverse immediately upon detecting anything in its path.
Warning: If your sensors fail to stop the door or show inconsistent performance, do not continue using the system. Professional intervention might be necessary to prevent potential safety risks.
Learn more about maintaining garage door safety features to understand the critical role these sensors play in protecting your family and property.
Ready to celebrate? If your sensors pass all tests, you have successfully troubleshot and restored your garage door’s safety mechanism.
Get Professional Help for Garage Door Sensor Problems in Seattle
Struggling with faulty garage door sensors or tired of recurring issues despite your best DIY efforts? The step-by-step guide you just read highlights how quickly simple misalignments, dirty lenses, or wiring problems can disrupt daily routines, risk safety, and leave you with a garage door that refuses to cooperate. If you are in the Greater Seattle area and want fast, expert solutions, Summit Garage Doors is here to help.

Why wait and stress over repeated trouble or unsafe systems? Contact our experienced technicians for a thorough garage door sensor diagnosis and repair. We offer prompt on-site service, trusted advice, and tailored solutions so you can enjoy confidence in your garage door’s safety and performance. See why homeowners and businesses have trusted Summit Garage Doors since 2013. If you want to keep your garage system working smoothly and safely, reach out today for a free consultation or service visit.
Frequently Asked Questions
How do I identify garage door sensor problems?
To identify garage door sensor problems, observe signs like the door only closing when you hold down the wall button, blinking indicator lights, or unexpected reversing. Start with a visual inspection and check for obstructions near the sensors.
What tools do I need to fix garage door sensor problems?
You’ll need work gloves, safety glasses, a step ladder, pliers, and wire cutters. Gather these tools to ensure a safe and effective repair process.
How often should I clean my garage door sensors?
You should clean your garage door sensors at least once a year to maintain optimal performance. Use a soft, lint-free cloth to gently wipe the sensor lenses and keep them free of dirt and dust.
What steps should I take if the sensors are misaligned?
If your sensors are misaligned, use a measuring tape to ensure they are positioned at the same height and directly facing each other. Adjust them slightly until the LED indicator lights show a solid green, then secure the mounting brackets without overtightening.
How can I test if my garage door sensors are functioning correctly?
Test your garage door sensors by placing an object like a wooden block under the closing door. If the sensors work properly, the door should immediately stop and reverse upon detecting the obstruction.
What should I do if the sensors still don’t work after cleaning and realigning?
If the sensors do not work after cleaning and realigning, inspect the sensor wires for signs of damage. If you find frayed or disconnected wires, you may need to seek professional assistance to ensure safety and proper functionality.
Recommended
- Understanding Why Garage Door Won’t Close: Key Causes – Summit Garage Doors | Seattle’s #1 Garage Door Repair & Installation
- Fixing Garage Door Spring Issues: A Step-by-Step Guide – Summit Garage Doors | Seattle’s #1 Garage Door Repair & Installation
- Understanding Why Garage Doors Won’t Open – Summit Garage Doors | Seattle’s #1 Garage Door Repair & Installation
- Understanding Garage Door Safety Features for Homeowners – Summit Garage Doors | Seattle’s #1 Garage Door Repair & Installation