Setting up a garage door keypad sounds simple, but there is a surprising level of detail that can make or break your experience. Most people do not realize that incorrect battery installation is one of the top reasons new keypads fail to function out of the box. Every step from choosing your tools to mounting position can make a massive difference in security and convenience, and skipping these details is where trouble starts.
Table of Contents
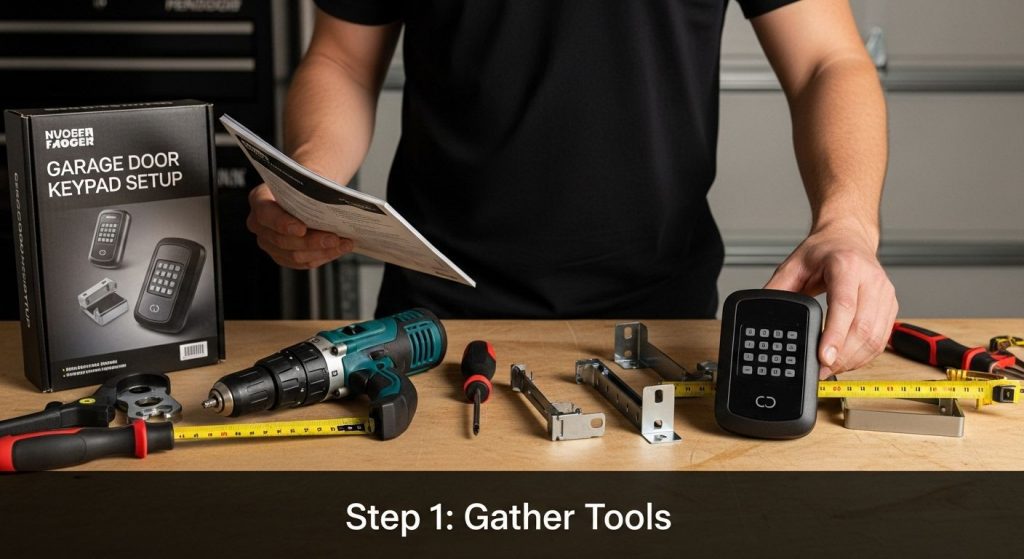
- Step 1: Gather Necessary Tools And Materials
- Step 2: Locate The Keypad Installation Site
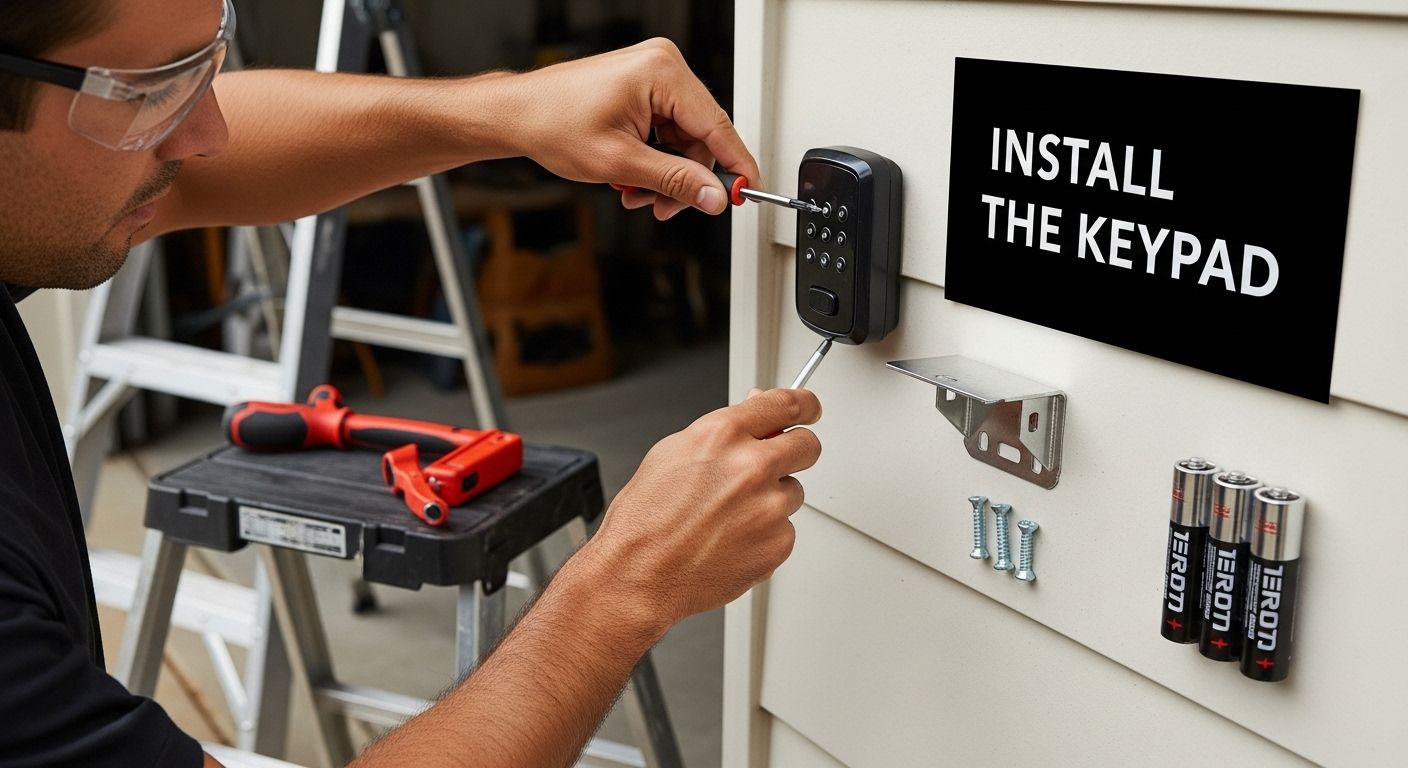
- Step 3: Install The Keypad Securely
- Step 4: Program Your Personal Access Code
- Step 5: Test The Keypad Functionality
Quick Summary
| Key Point | Explanation |
|---|---|
| 1. Gather necessary tools before installation | Ensure you have a drill, screwdriver, measuring tape, and safety glasses. These tools are critical for a smooth setup process. |
| 2. Choose an optimal keypad location | Select a site near the door, protected from the weather, and at a height of 42-48 inches for easy access. |
| 3. Securely install the keypad with precision | Clean the surface, align the mounting bracket carefully, and ensure screws are properly tightened to avoid future issues. |
| 4. Program a unique access code | Create a memorable but secure code by avoiding common patterns. Follow the manufacturer’s instructions methodically. |
| 5. Conduct a thorough functionality test | Test the keypad from various distances and lighting conditions to ensure reliable operation. This helps identify potential issues early. |
Step 1: Gather Necessary Tools and Materials
Before beginning your garage door keypad setup, having the right tools and materials will streamline the installation process and prevent unnecessary interruptions. Proper preparation ensures a smooth, efficient installation that minimizes potential complications.
Essential Tools for Keypad Installation
Starting with the right equipment is crucial for a successful garage door keypad setup. You will need a few basic tools that are likely already in your home toolkit. Recommended tools include:
- Drill with appropriate drill bits
- Screwdriver (Phillips head and flathead)
- Measuring tape
- Pencil for marking mounting locations
- Level for ensuring precise alignment
- Ladder or stable step stool
- Safety glasses
In addition to tools, gather the specific materials required for your keypad installation. Most garage door keypad systems come with mounting hardware, but double-checking the contents of your installation kit is recommended. Verify your installation kit includes:
- Mounting bracket
- Screws specific to your keypad model
- Batteries (typically 9-volt or CR2032 lithium)
- Manufacturer’s instruction manual
Before starting the installation, review your garage door opener’s compatibility with the keypad. Not all keypads work universally, so confirming system compatibility prevents potential setup challenges. Some keypads require specific programming sequences or might only function with certain opener brands.
Carefully inspect your chosen keypad and installation materials for any damage or missing components. If anything appears incomplete or compromised, contact the manufacturer or retailer before proceeding. This preliminary check can save significant time and frustration during the installation process.
To streamline troubleshooting if issues arise during or after setup, use this table to find common problems, likely causes, and solutions based directly on the article’s guidance.
| Problem | Likely Cause | Solution |
|---|---|---|
| Keypad does not respond | Incorrect battery installation or dead battery | Verify battery type and polarity; replace if needed |
| Buttons are hard to press | Dirty or misaligned mounting | Clean mounting surface; check alignment |
| Poor wireless range | Signal blocked by metal or electrical interference | Relocate keypad; avoid metal or thick walls |
| Keypad wobbles or moves | Loose or over-tightened screws | Check and adjust screw tightness |
| Code is not accepted | Programming error or wrong code sequence | Repeat programming strictly per manual |
| Unresponsive in weather | Exposed to harsh conditions | Move keypad to sheltered location |
When selecting a mounting location, consider accessibility and visibility. The keypad should be positioned near the garage door, typically within arm’s reach and at a height comfortable for most users. Ensure the location provides protection from direct sunlight and extreme weather conditions, which could potentially damage the electronic components.
Taking time to gather and organize your tools and materials transforms the garage door keypad setup from a potentially complex task into a manageable home improvement project. Proper preparation sets the foundation for a successful installation that enhances your home’s security and convenience.
To help you prepare for installation, here is a table summarizing all the recommended tools and materials, along with their specific purposes.
| Tool / Material | Purpose |
|---|---|
| Drill with drill bits | Making pilot holes for screws |
| Phillips & flathead screwdriver | Securing screws for mounting |
| Measuring tape | Marking precise installation height |
| Pencil | Marking mounting locations |
| Level | Ensuring keypad is vertically aligned |
| Ladder or step stool | Safely reaching installation height |
| Safety glasses | Protecting eyes while drilling |
| Mounting bracket & screws | Securing keypad to surface (comes with kit) |
| Batteries | Powering the keypad (type varies by model) |
| Manufacturer’s manual | Reference for installation & programming steps |
Step 2: Locate the Keypad Installation Site
Selecting the optimal location for your garage door keypad is a critical step that impacts both functionality and security. The right placement ensures convenient access while protecting the device from potential damage or unauthorized tampering.
According to the International Door Association, strategic keypad positioning is essential for maintaining home security. Your chosen location should balance accessibility with protection, considering several key factors that influence successful installation.
Strategic Positioning Considerations
Begin by examining the exterior side of your garage near the door. The ideal installation site should meet multiple criteria:
- Within easy reach of an average adult
- Protected from direct sunlight and extreme weather
- Close enough to the door for convenient entry
- Away from potential physical impacts
- Not visible from the street
Measure the distance from the ground to ensure the keypad is approximately 42 to 48 inches high. This height accommodates most adult users while remaining out of children’s immediate reach. Use your level to confirm a perfectly vertical placement, which prevents water accumulation and ensures proper button functionality.
Consider the proximity to your garage door opener. Most wireless keypads require a clear line of communication with the opener’s receiver. Avoid locations with significant metal obstructions or electrical interference that might disrupt signal transmission. Metal siding, thick concrete walls, or nearby electrical panels can potentially weaken the keypad’s communication capabilities.
Examine the mounting surface carefully. Solid, flat surfaces like wooden door frames or brick walls provide the most stable foundation. Avoid areas with existing damage, uneven surfaces, or previous mounting holes that could compromise the keypad’s security. Smooth, intact surfaces ensure a tight, reliable installation.
Think about daily usage patterns. Position the keypad where family members can easily access it without blocking the driveway or requiring awkward body movements. Consider potential weather conditions that might make entry challenging, such as rain or snow, and choose a location that provides some natural shelter.
Before drilling any holes, perform a test placement. Use painter’s tape to mark the potential location and step back to visualize the installation. This preliminary step allows you to assess visibility, accessibility, and overall positioning without making permanent modifications.
Carefully verifying your keypad’s installation site sets the foundation for a secure, convenient home entry system.
Taking time to assess multiple factors ensures your garage door keypad becomes a seamless, functional addition to your home’s security infrastructure.
Step 3: Install the Keypad Securely
With your installation site carefully selected, the next crucial phase involves physically mounting the garage door keypad. This step requires precision, patience, and careful attention to detail to ensure a secure and functional installation that will provide reliable access for years to come.
Begin by thoroughly cleaning the mounting surface with a dry cloth to remove any dust, dirt, or debris. A clean surface ensures maximum adhesion and prevents potential mounting issues. If the surface is particularly dirty, use a mild cleaning solution and allow it to dry completely before proceeding.
Mounting Process and Precision
Carefully align the mounting bracket with the marks you previously made using your level. Precision is critical – even a slight misalignment can cause operational problems or make the keypad difficult to use. Hold the bracket firmly against the surface and use a pencil to mark the exact drill hole locations. Double-check your measurements to confirm absolute accuracy before drilling.
When drilling pilot holes, select a drill bit slightly smaller than the mounting screws to ensure a tight, secure fit. Drill slowly and steadily, applying consistent pressure to create clean, precise holes. Wear safety glasses to protect your eyes from potential debris. After drilling, use a small brush or compressed air to remove any drill shavings from the holes.
Secure the mounting bracket using the provided screws, ensuring they are tightened evenly but not over-tightened. Too much pressure can strip the holes or damage the mounting surface. Use your screwdriver with controlled, steady movements. A slight resistance indicates the screw is properly seated.
Next, attach the keypad to the mounted bracket. Most models feature a sliding or clicking mechanism that allows easy installation. Gently but firmly press the keypad into place, listening for a clear click or checking for a secure fit. Wiggle the keypad slightly to confirm it’s firmly attached and doesn’t move or wobble.
Install the batteries according to the manufacturer’s instructions. Pay close attention to the correct polarity, typically indicated by (+) and (-) symbols inside the battery compartment. Incorrect battery installation can prevent the keypad from functioning. Some models require specific battery types, so verify the exact specifications in the instruction manual.
After installation, perform a comprehensive functionality test. Enter the default or pre-programmed code to verify the keypad responds correctly. Check that the buttons press smoothly and that the display (if present) illuminates properly. Test the keypad from different angles and distances to ensure consistent performance.
By following these detailed steps, you create a secure, reliable garage door keypad installation that enhances your home’s accessibility and security. Patience and precision during this process prevent future operational issues and ensure a smooth, trouble-free experience.
Step 4: Program Your Personal Access Code
Programming your personal access code represents the final critical step in securing your garage door keypad. This process transforms the device from a mere installation into a personalized security mechanism that protects your home and provides convenient entry.
According to LiftMaster Security+ 2.0 guidelines, creating a robust access code requires careful consideration. Select a code that balances security and memorability. Avoid obvious combinations like birthdays, sequential numbers, or repeated digits that might be easily guessed by potential intruders.
Creating a Secure and Memorable Code
Most garage door keypads support 4 to 8 digit codes, providing flexibility in code selection. Recommended code strategies include:
- Combining unrelated numbers from different personal references
- Using a pattern that makes sense only to you
- Avoiding obvious sequences like 1234 or 9876
- Selecting numbers not directly connected to public personal information
Before programming, consult your keypad’s instruction manual for specific programming instructions. While general principles are similar across models, each manufacturer might have unique sequence requirements. Typically, the process involves pressing a designated programming button, entering a default or existing code, and then inputting your new personal code.
Carefully follow the manufacturer’s exact programming sequence. Some keypads require holding specific buttons simultaneously, while others need a precise series of button presses. Patience is key – rushing through the programming can result in errors that lock you out or require resetting the entire system.
Once you enter your new code, most keypads will provide visual or audible confirmation. This might include a blinking light, a beep, or a display message indicating successful programming. Test the new code immediately by closing the garage door and attempting entry using your freshly programmed sequence.
Create a backup method for code recovery. Write down the new code and store it in a secure location separate from your garage area. Consider sharing the code with a trusted family member who can assist you if you forget or encounter programming issues.
Remember that your access code is a critical security feature. Treat it like a password. Avoid sharing it broadly, change it periodically, and be mindful of who knows the code. For households with multiple users, some advanced keypads allow creating individual codes, providing an additional layer of access management and security tracking.
By methodically programming your personal access code, you transform your garage door keypad from a simple mechanical device into a personalized security solution. Take your time, follow instructions carefully, and prioritize creating a code that offers both convenience and protection.
Step 5: Test the Keypad Functionality
Testing your newly installed garage door keypad is a critical final step that verifies the entire installation process and ensures your home security system operates correctly. This comprehensive evaluation goes beyond simple button pressing and requires a methodical approach to confirm full operational reliability.
According to the Federal Register’s safety guidelines, thorough testing is essential to guarantee proper garage door opener functionality. Begin with a systematic approach that checks multiple aspects of your keypad’s performance.
Initiate testing by entering your programmed access code multiple times from different angles and distances. Verify that the keypad responds consistently:
- Check button responsiveness
- Confirm clear button press feedback
- Ensure visibility in various lighting conditions
- Test code entry from different proximity levels
Pay close attention to the garage door’s response when entering your code. The door should smoothly open or close without hesitation, jerking, or unusual sounds. Unusual movements might indicate underlying installation or programming issues that require immediate attention.
Test your keypad’s functionality under different scenarios. Try entering the code with slightly damp hands, wearing gloves, or during different times of day to ensure consistent performance. Simulate real-world conditions that might impact your ability to enter the code quickly and accurately.
Verify the keypad’s wireless communication range by testing code entry from various distances. Stand at different points near your garage to confirm the signal strength remains consistent. Some keypads have limited range, so understanding these limitations prevents future frustration.
Check the battery status and connection. Most keypads will display a low battery warning, but manually inspect the battery connection and condition. Loose batteries or corrosion can interrupt keypad functionality. If you notice any issues, replace the batteries immediately and retest the entire system.
Perform a security test by attempting incorrect code entries. Most modern keypads have built-in security features that lock out repeated incorrect attempts. Understand these security mechanisms to prevent accidental lockouts. Typically, this involves waiting a specified time after multiple failed attempts before trying again.
Involve other household members in the testing process. Have each potential user enter the code to ensure everyone can operate the keypad comfortably. This collaborative testing helps identify any potential usability issues and ensures everyone understands the proper code entry technique.
Document your testing results. Note any inconsistencies, performance quirks, or areas requiring adjustment. If persistent issues arise, consult the manufacturer’s troubleshooting guide or contact professional support. Comprehensive testing now prevents potential security and access problems in the future.
Protect Your Home With a Professionally Installed Garage Door Keypad
Struggling with garage door keypad setup or worried about getting every detail right to secure your home? Many homeowners face uncertainty around selecting the correct tools, ensuring compatibility, or programming robust access codes. With so many steps requiring precision and expertise, one small mistake can leave your home vulnerable or your entry system unreliable. Avoid the stress of do-it-yourself guesswork and let dedicated professionals make your garage more secure and your life easier.

Choose Summit Garage Doors for a seamless experience from start to finish. Our highly trained team specializes in installing and programming secure keypad systems that keep your family safe. Whether you need emergency repair or a full garage door upgrade, we bring personalized service and proven results to every project. Take the hassle and the risk out of setting up your garage door keypad. Visit Summit Garage Doors to schedule your appointment and discover the peace of mind that comes with expert service. Secure your home today—do not wait until security concerns become urgent.
Frequently Asked Questions
What tools do I need to install a garage door keypad?
You will need a drill, screwdriver, measuring tape, level, ladder, safety glasses, and a pencil. These tools help ensure accurate and secure installation.
How do I choose the right location for my garage door keypad?
Select a spot near the garage door that is within easy reach, protected from direct sunlight and severe weather, and away from potential physical impacts. Aim for a height of approximately 42 to 48 inches.
How do I program my personal access code on the keypad?
Consult your keypad’s instruction manual for exact programming steps. Generally, this involves pressing a designated programming button, entering a default code, then inputting your new code while following specific instructions from the manufacturer.
What should I do if my garage door keypad is not functioning properly?
If your keypad is unresponsive, check the battery installation and condition, ensure there are no physical obstructions, and verify the keypad’s compatibility with your garage door opener. Refer to the manufacturer’s troubleshooting guide for further assistance.
Recommended
- How to Program Garage Remotes in Seattle for 2025 – Summit Garage Doors | Seattle’s #1 Garage Door Repair & Installation
- Garage Door Opener Installation in Seattle: 2025 Guide for Homeowners – Summit Garage Doors | Seattle’s #1 Garage Door Repair & Installation
- Garage Door Installation Guide for Seattle Homeowners 2025 – Summit Garage Doors | Seattle’s #1 Garage Door Repair & Installation
- Garage Door Etiquette Seattle: Essential Tips for Homeowners 2025 – Summit Garage Doors | Seattle’s #1 Garage Door Repair & Installation